|||
|||
A friend of mine from work got a pool cleaner to clean her fish pond. She said it worked quite well but there we’re a few things she didn’t like about it. She knew I had a 3D printer so she asked me about printing her an improved version. It seemed like an interesting project, so I agreed.
How the pool cleaner works is quite interesting. You connect your garden hose up to it and it uses the Venturi effect to suck up stuff from your pool into a filter bag. I wouldn’t have thought that a design like that would create enough suction to be useful, but, from my friends account, it works really well.
I had a few questions about printing an improved pool cleaner:
From the materials I had on hand (PLA, ABS and PETG), I picked PETG for a few reasons:
Once I had material selection out of the way, I wanted to check to see if I could easily glue parts together and if thoes parts would then be watertight. To test that, I designed and printed three little test parts. I glued them together with super glue (cyanoacrolate) and was supprised to find that I couldn’t break it with my hands (even when I really tried to). It also seemed to be airtight as I could blow on it as hard as I can and it didn’t leak (that I could tell). The test part performed far above my expectations.
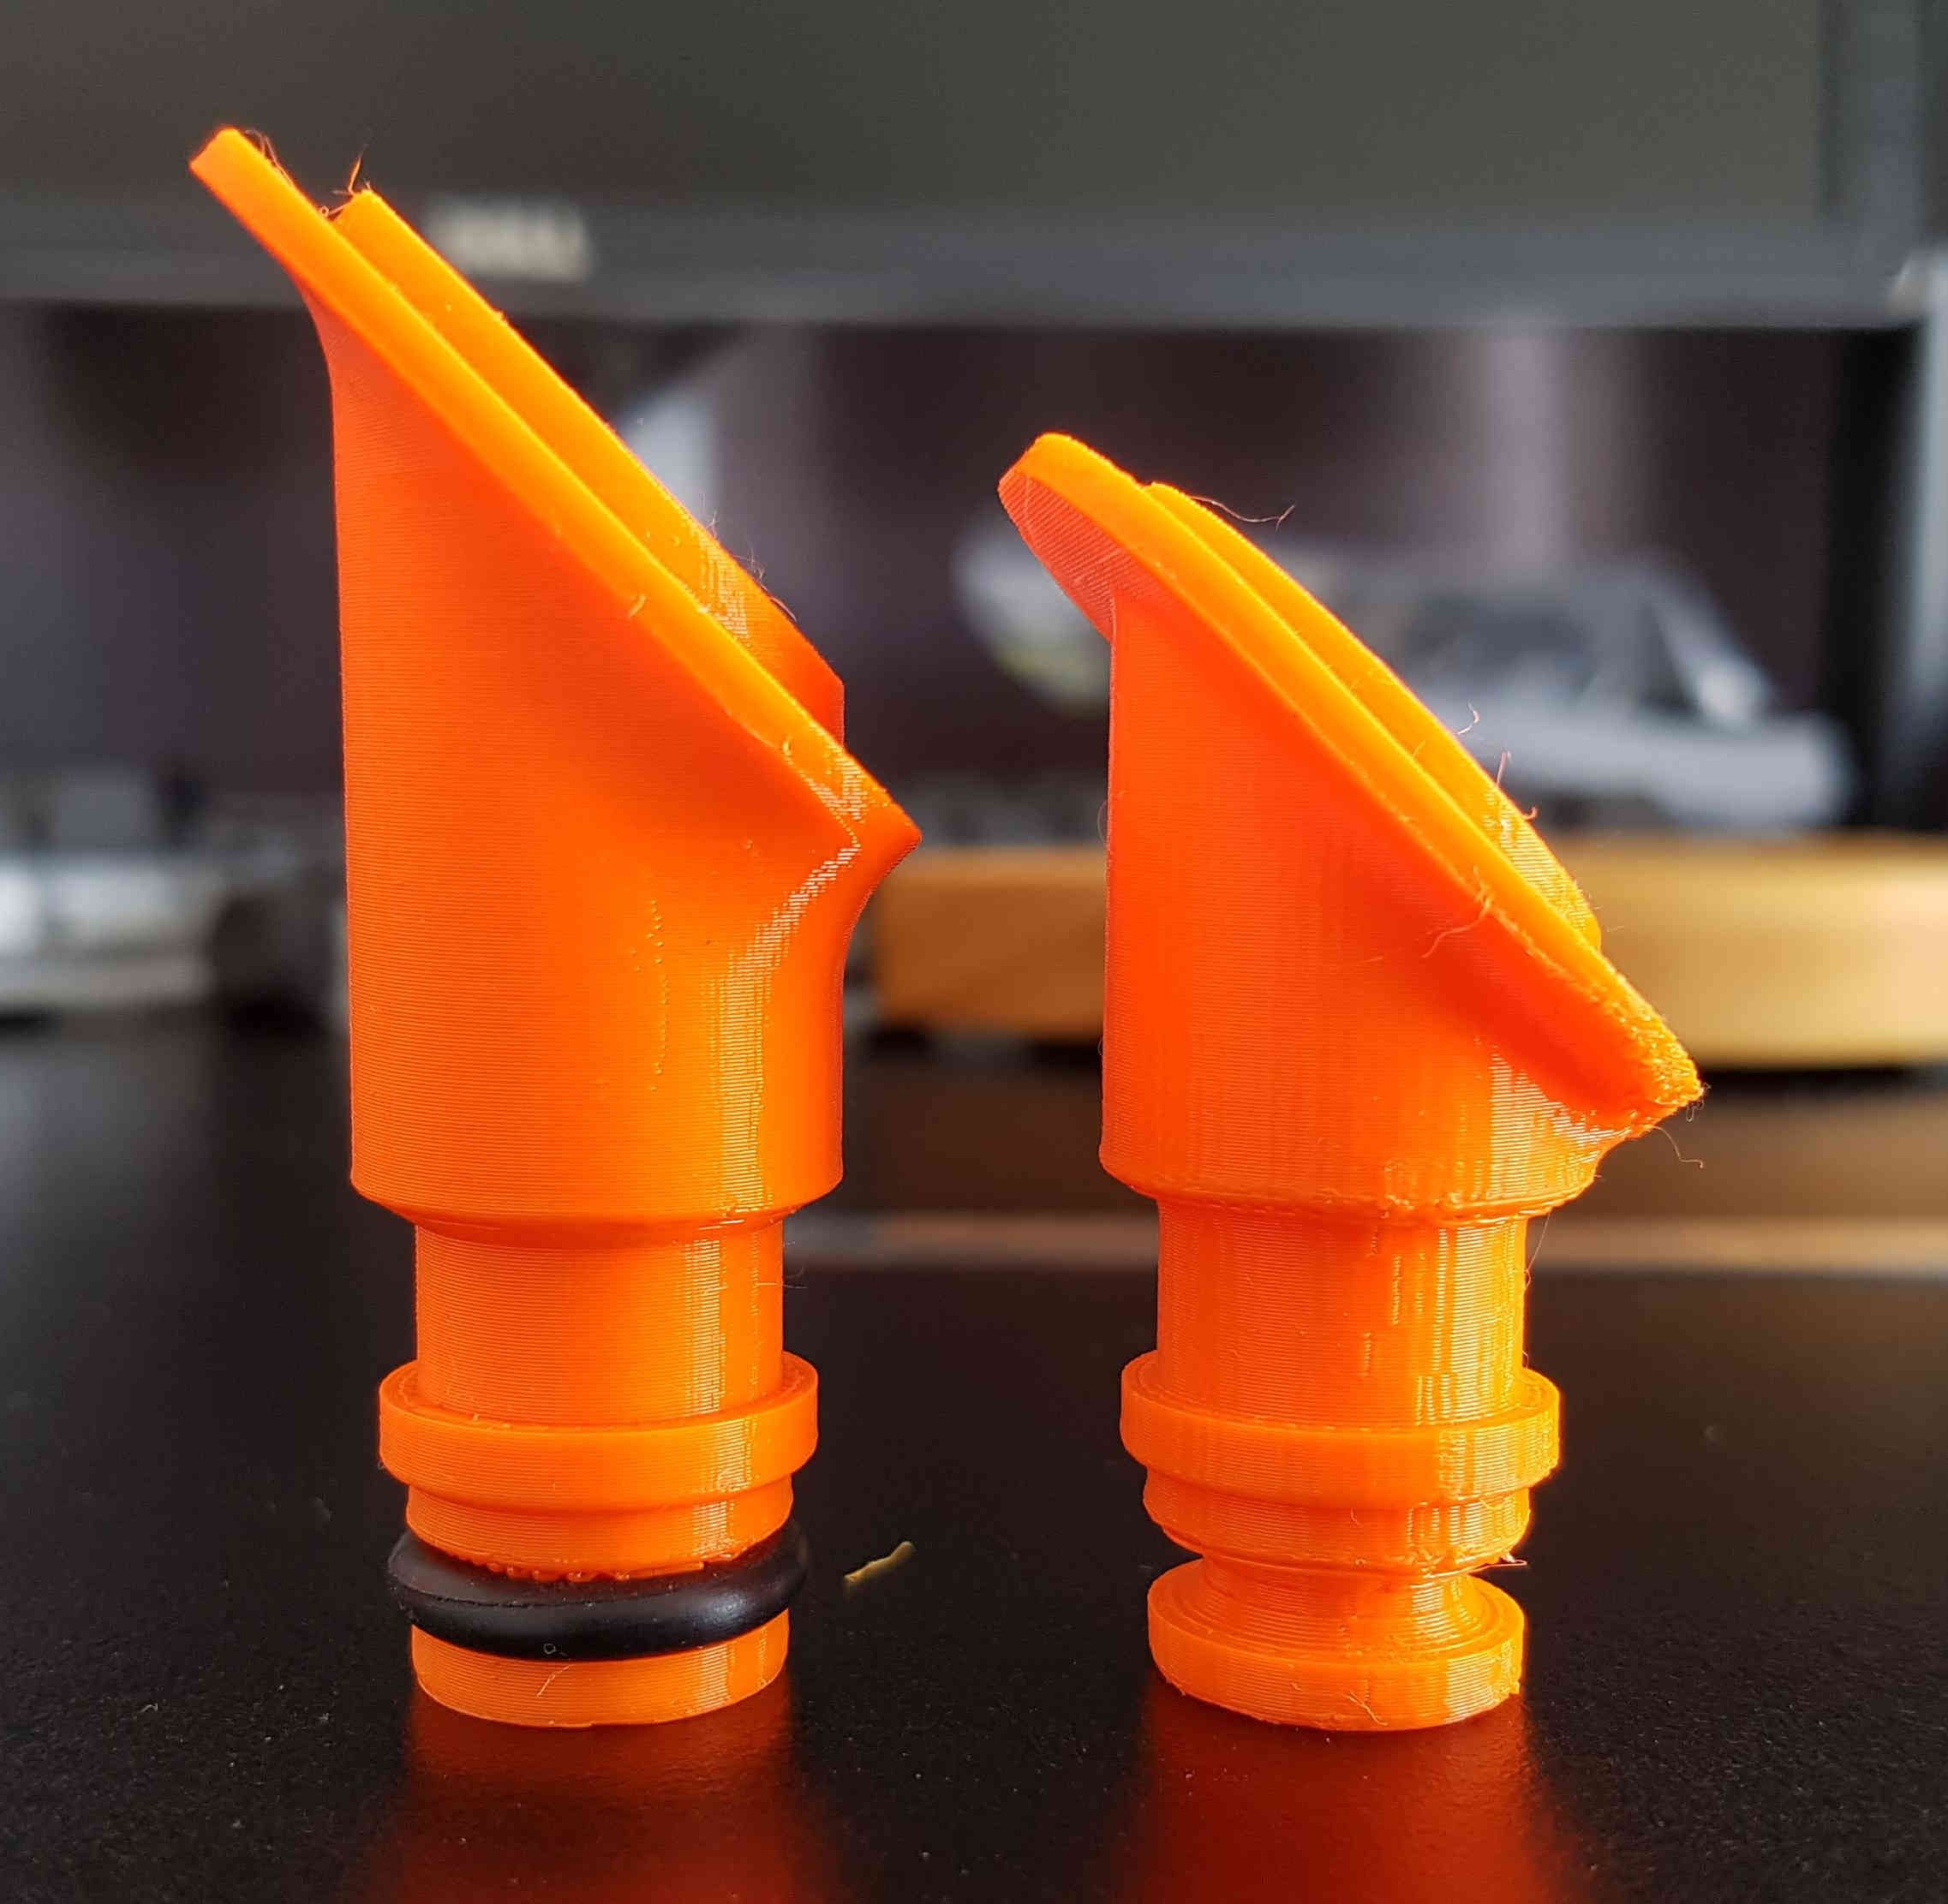
 The glue and airtight test part. It is three parts glued together and is hollow on the inside. The top bit is a nozzle that I could blow on to test the airtightness. The three parts all mate together with bosses for extra glue surface area.
With the test part done, I started to design the pool cleaner in Solidworks. I wasn’t sure how critical the dimensions of the Venturi system were, so I just copied them from the original. I don’t like printing support material as I find it a pain to remove. This meant I had to split the design up into parts and print them separately. This also means that a failed print doesn’t cost me so much in filament. Because the parts were all to be glued together, I had to think a lot about maximising gluing surface area in order to get strong bonds.
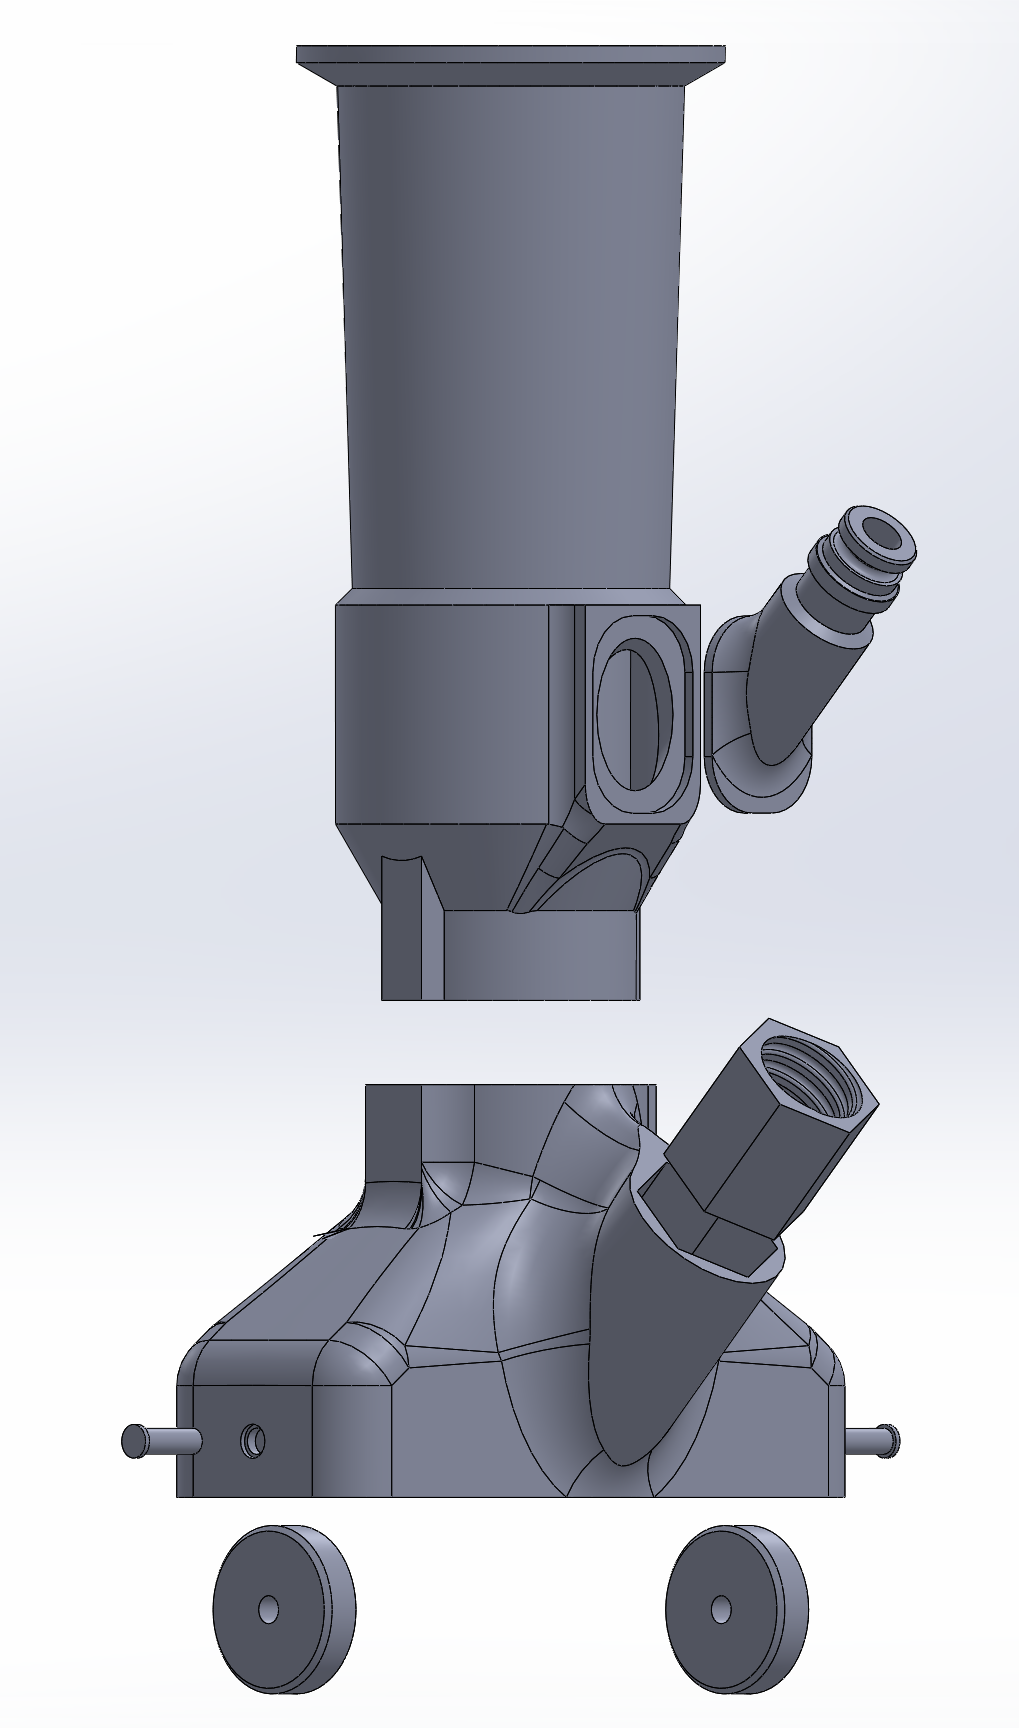
Firstly, I modeled the hose connection. I copied the dimensions of the original. I put a boss on it so that it would fit into the main body of the cleaner with lots of surface area for glue. Next, I designed the main body. This was more or less the same as the original but with a couple of minor adjustments to suit printing. I added locating features so that when the base was fitted, it wouldn’t be able to rotate like the original could. I printed the hose connection and the main body and tried them out. I found that hose connection was slightly too short as the hose wouldn’t go on the whole way without hitting the body. That was a quick and easy fix though.
 The hose connections. Left is the final one. The one on the right was too short.
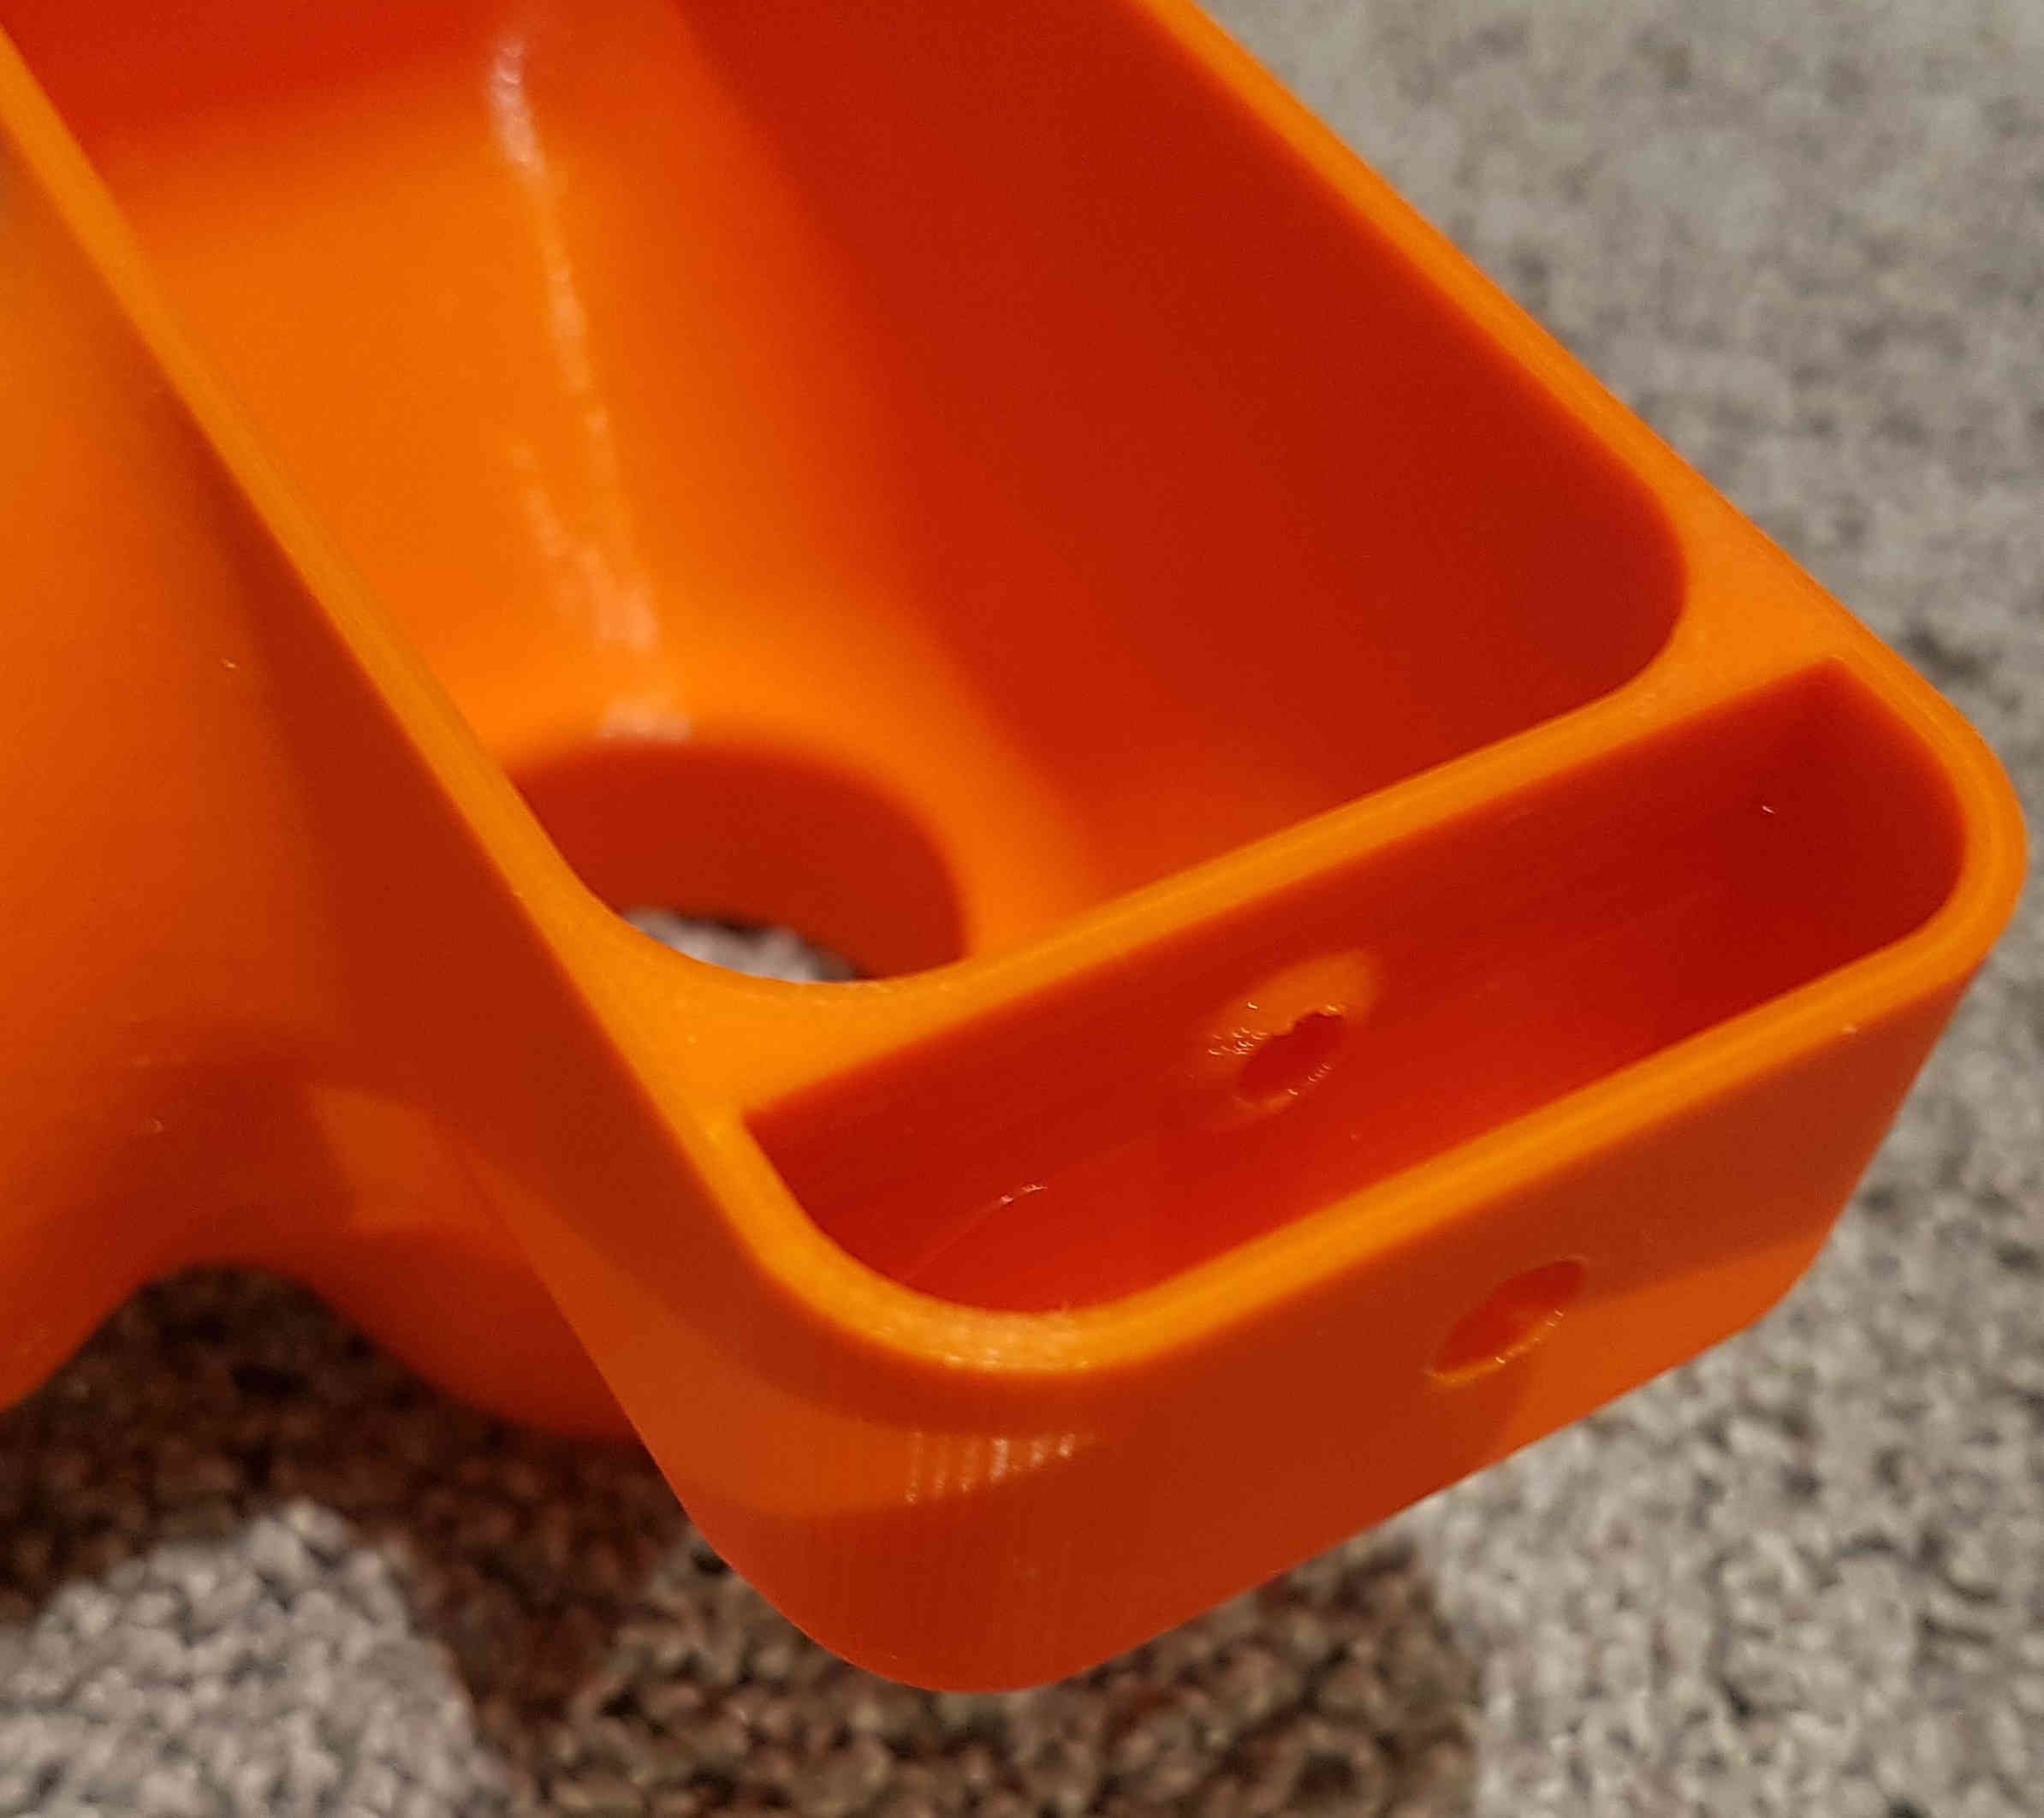
 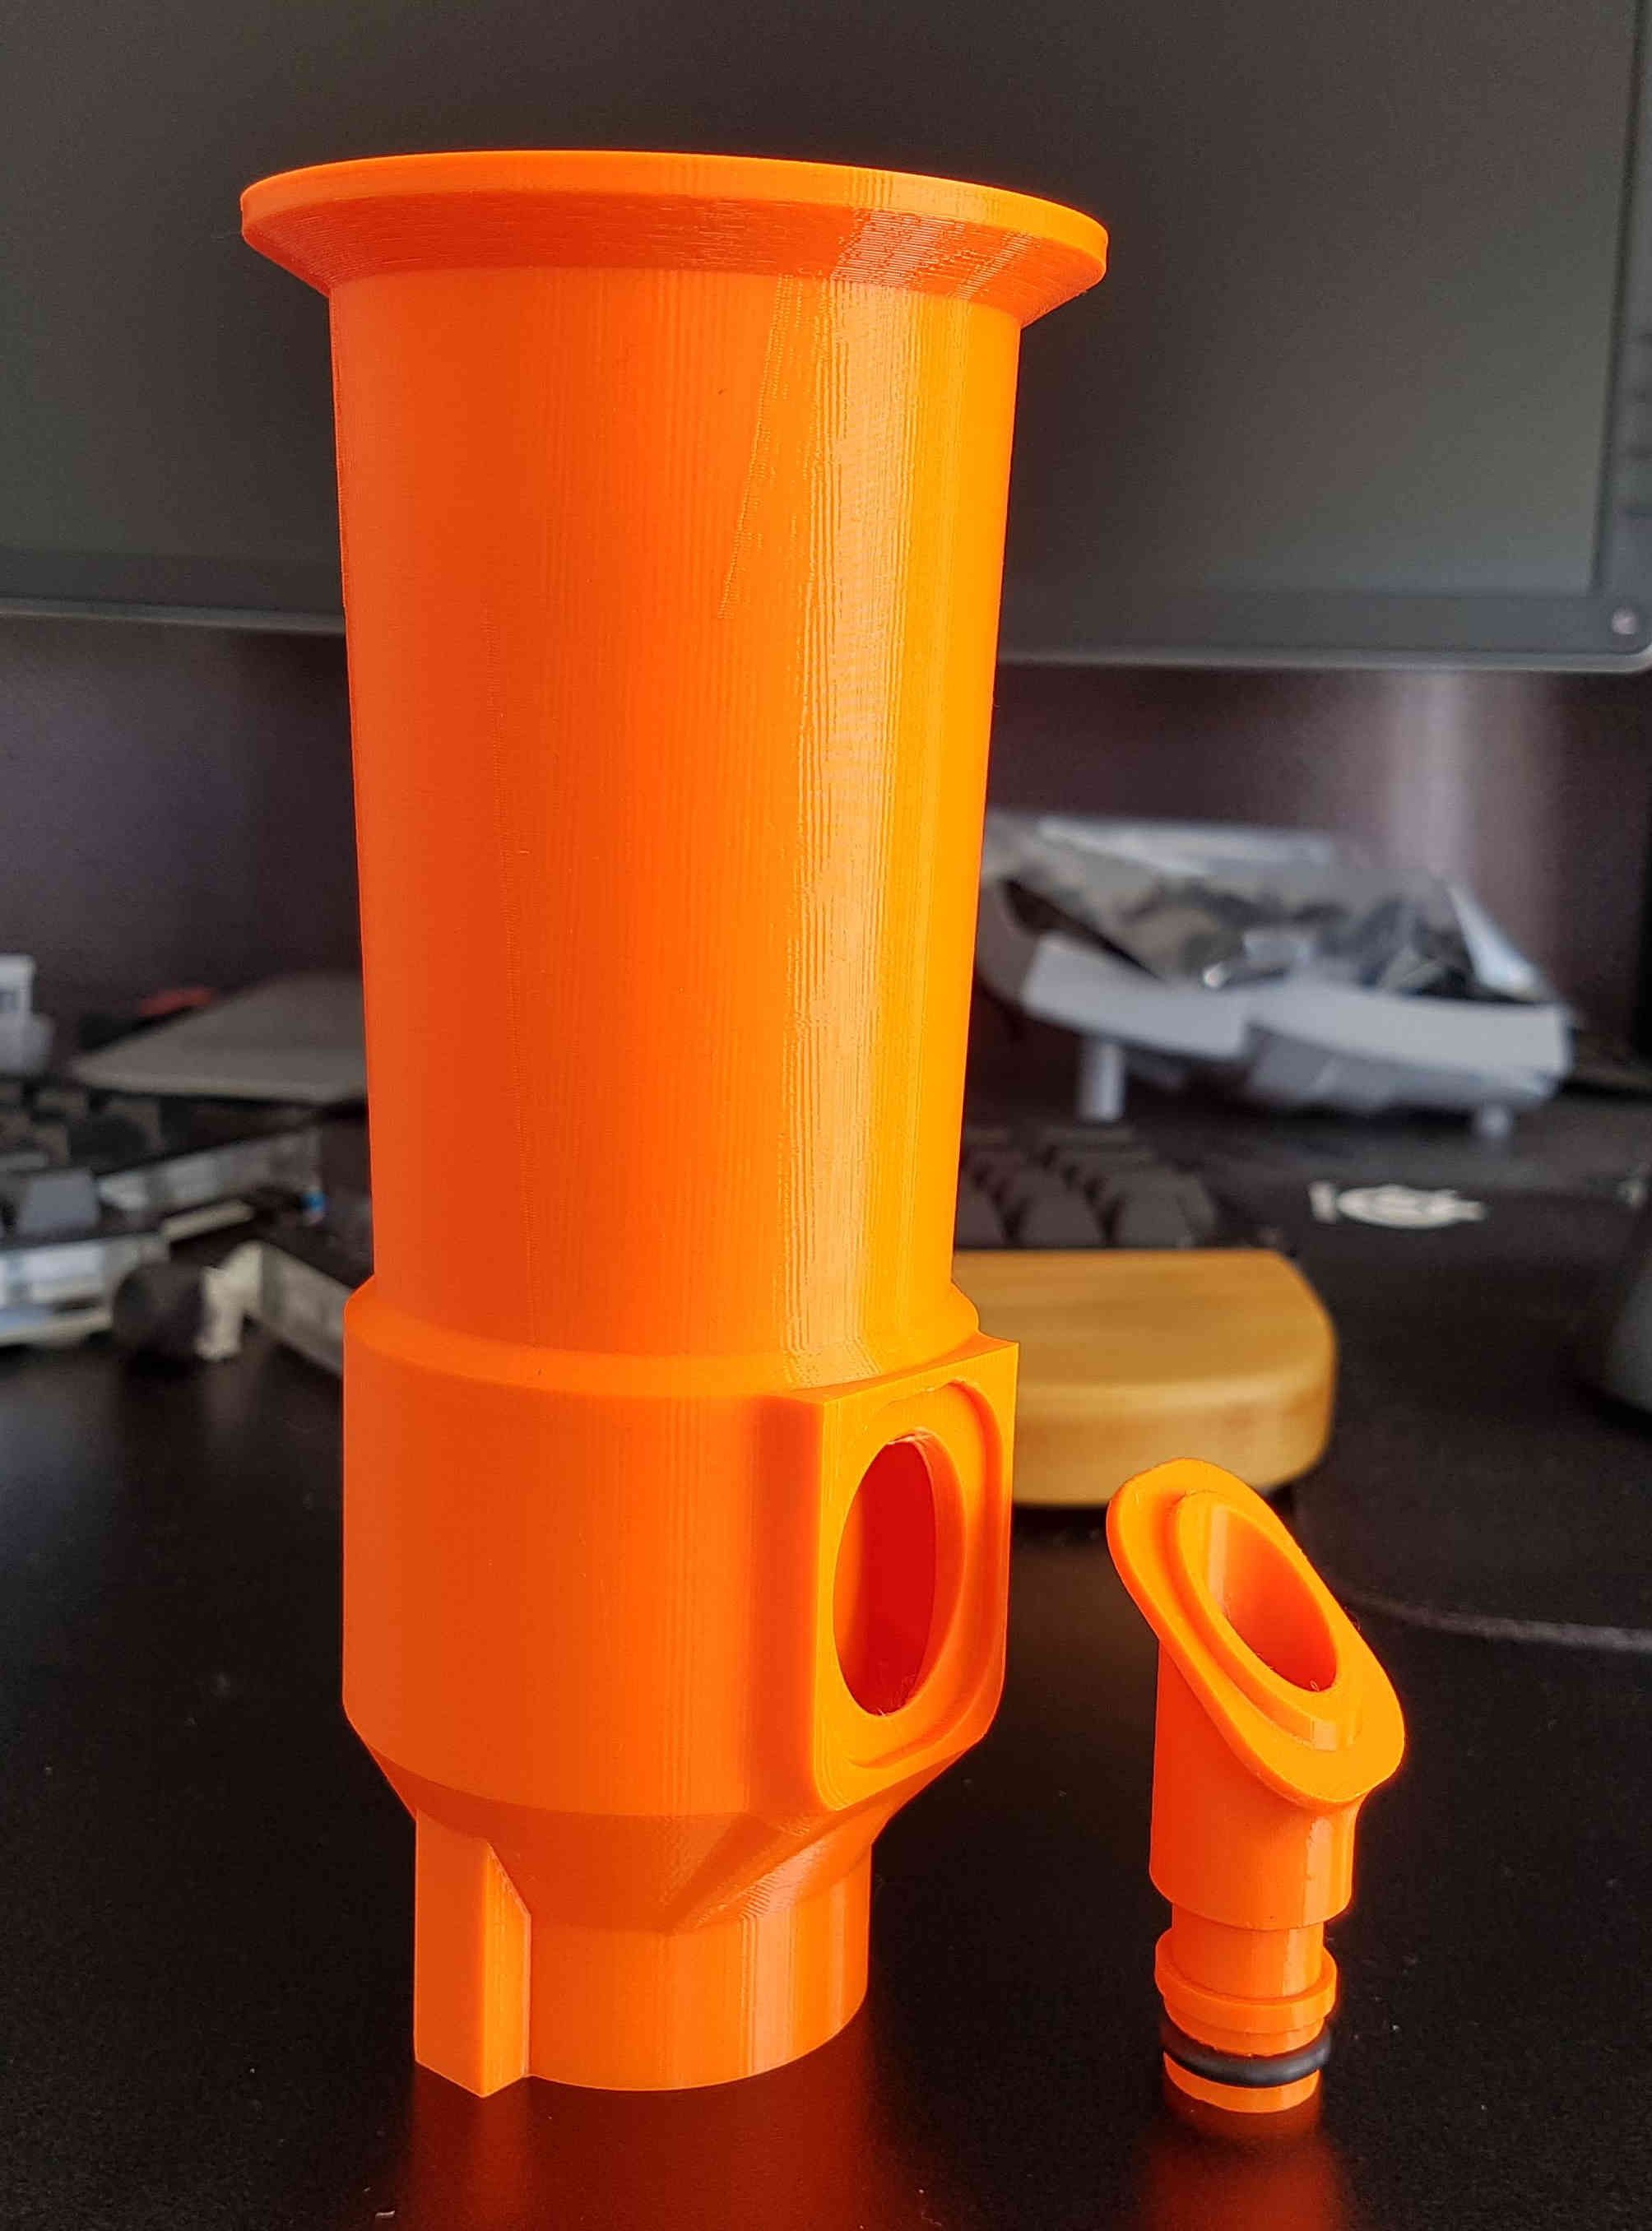 The main body and hose connection. You can see how the hose connection fits into the body to support a strong glue bond.
 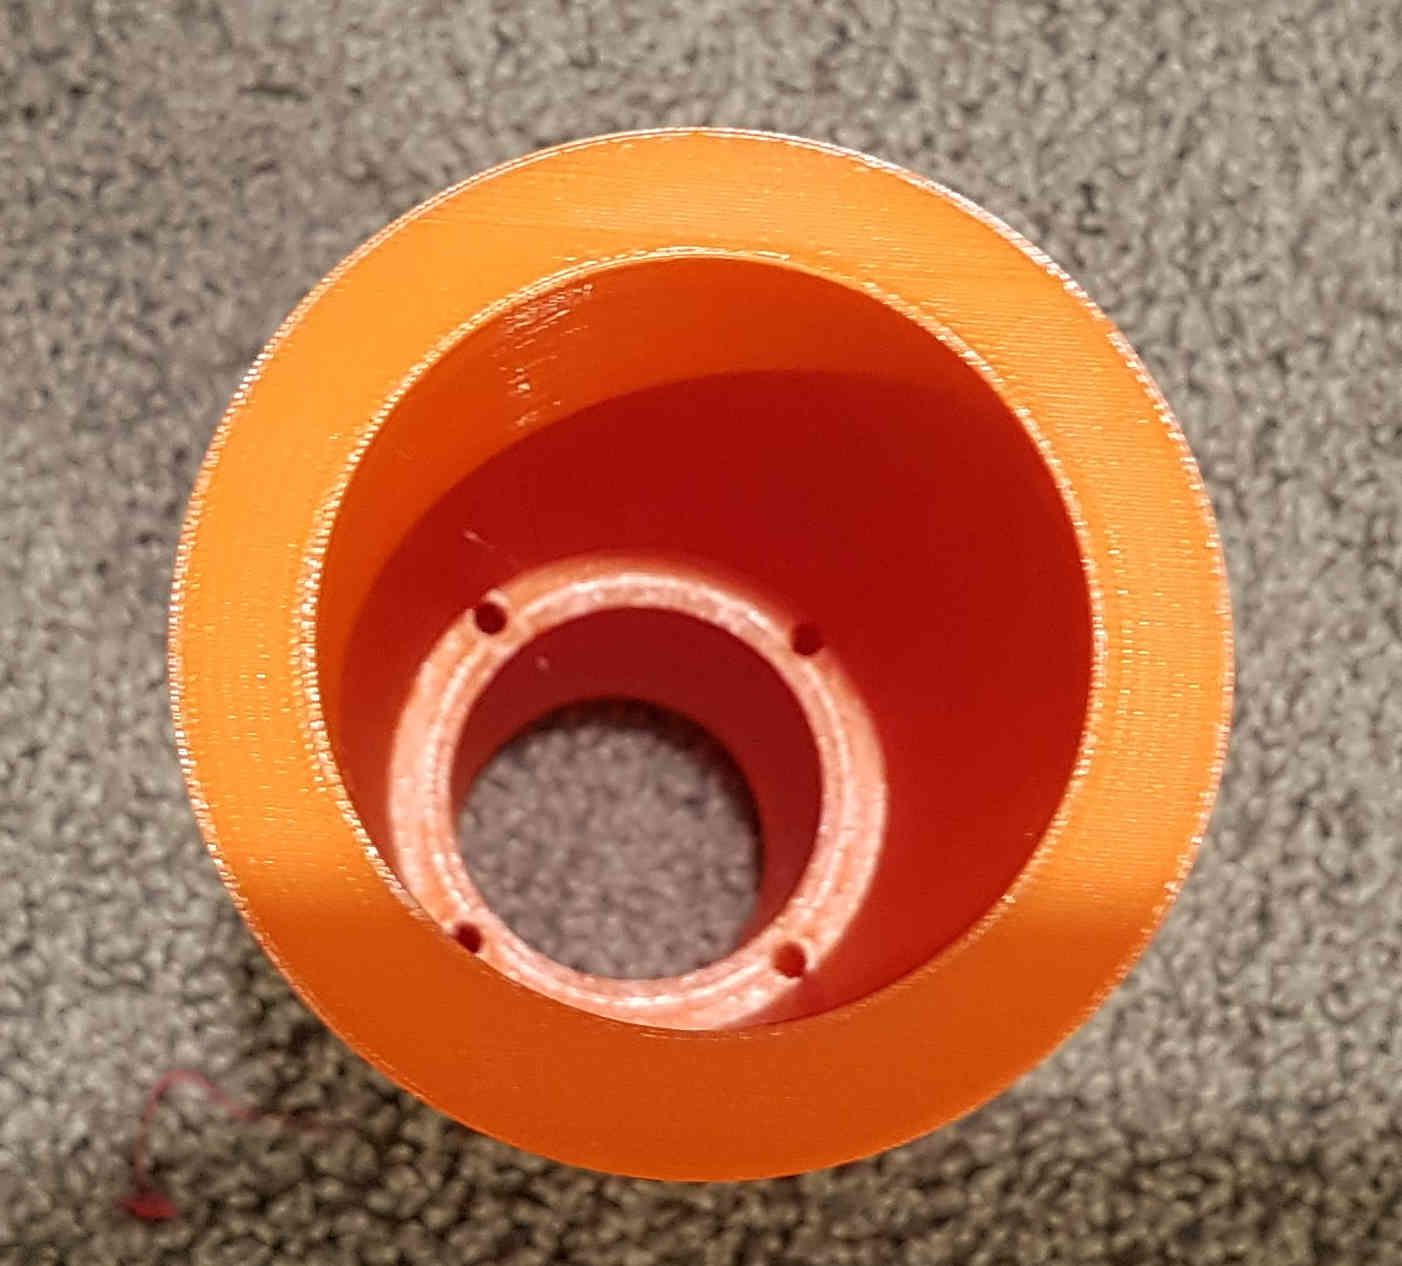 Top view of the main body. The water from the hose goes into an internal cavity and comes out of the four small holes. This causes a pressure difference between the top of the pool cleaner and the base, sucking stuff up through it.
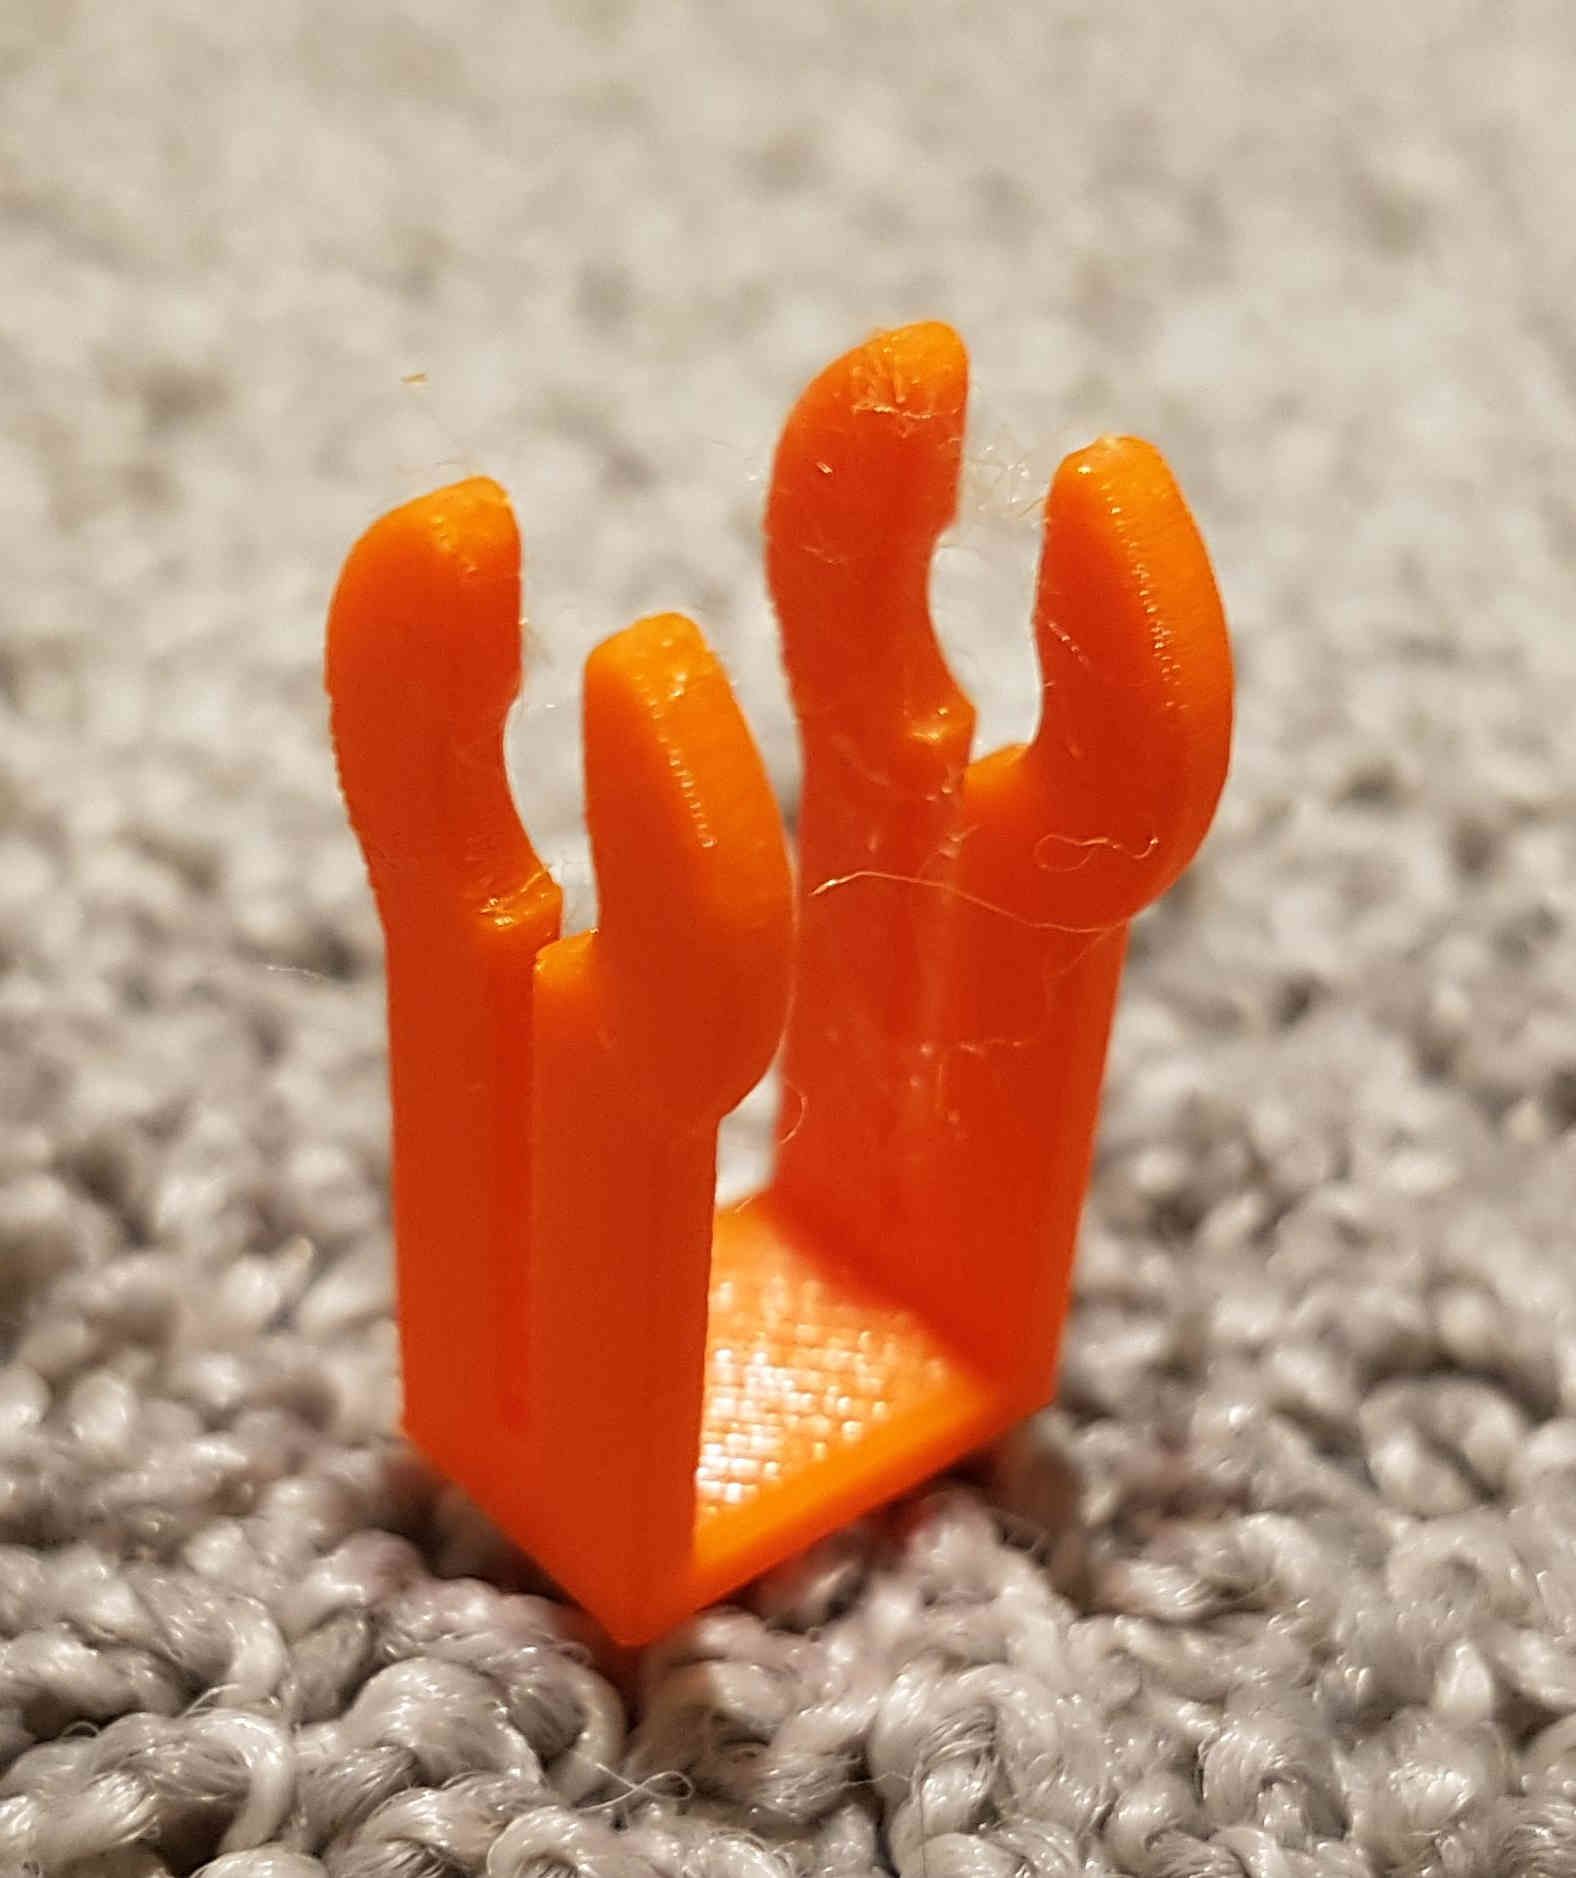
Next came the difficult part of the project, the base. I ended up printing four different iterations of the base, mostly due to problems with the wheels (the wheels allow the cleaner to run across the bottom of the pool easily while maintaining a gap between the cleaner base and the bottom of the pool). The first three versions of the base had clips that held the axle of the wheel in. The idea was that if required, it could be disassembled. The issue with this is that the clips were very fragile and usually broke the first time I tried to put a wheel in.
 Wheel clips before I broke them. The axle was to be pushed in from the top.
After the first failure, I printed a test clip. This test clip worked perfectly even after I inserted and removed the axle a few times.
 The test wheel clip. The wheel sits between vertical bits with the axle clipping into the cutout. There are slots cut down the sides to allow the clip to flex.
With the test clip working well, I printed another version of the base with the clips just as they were in the test. I confidently whet to push the axle in and SNAP! I still don’t understand how the test clip worked perfectly and the real one, using the same design, broke so easily. So I printed out yet another version with the clips even thicker and stronger. That didn’t work either.
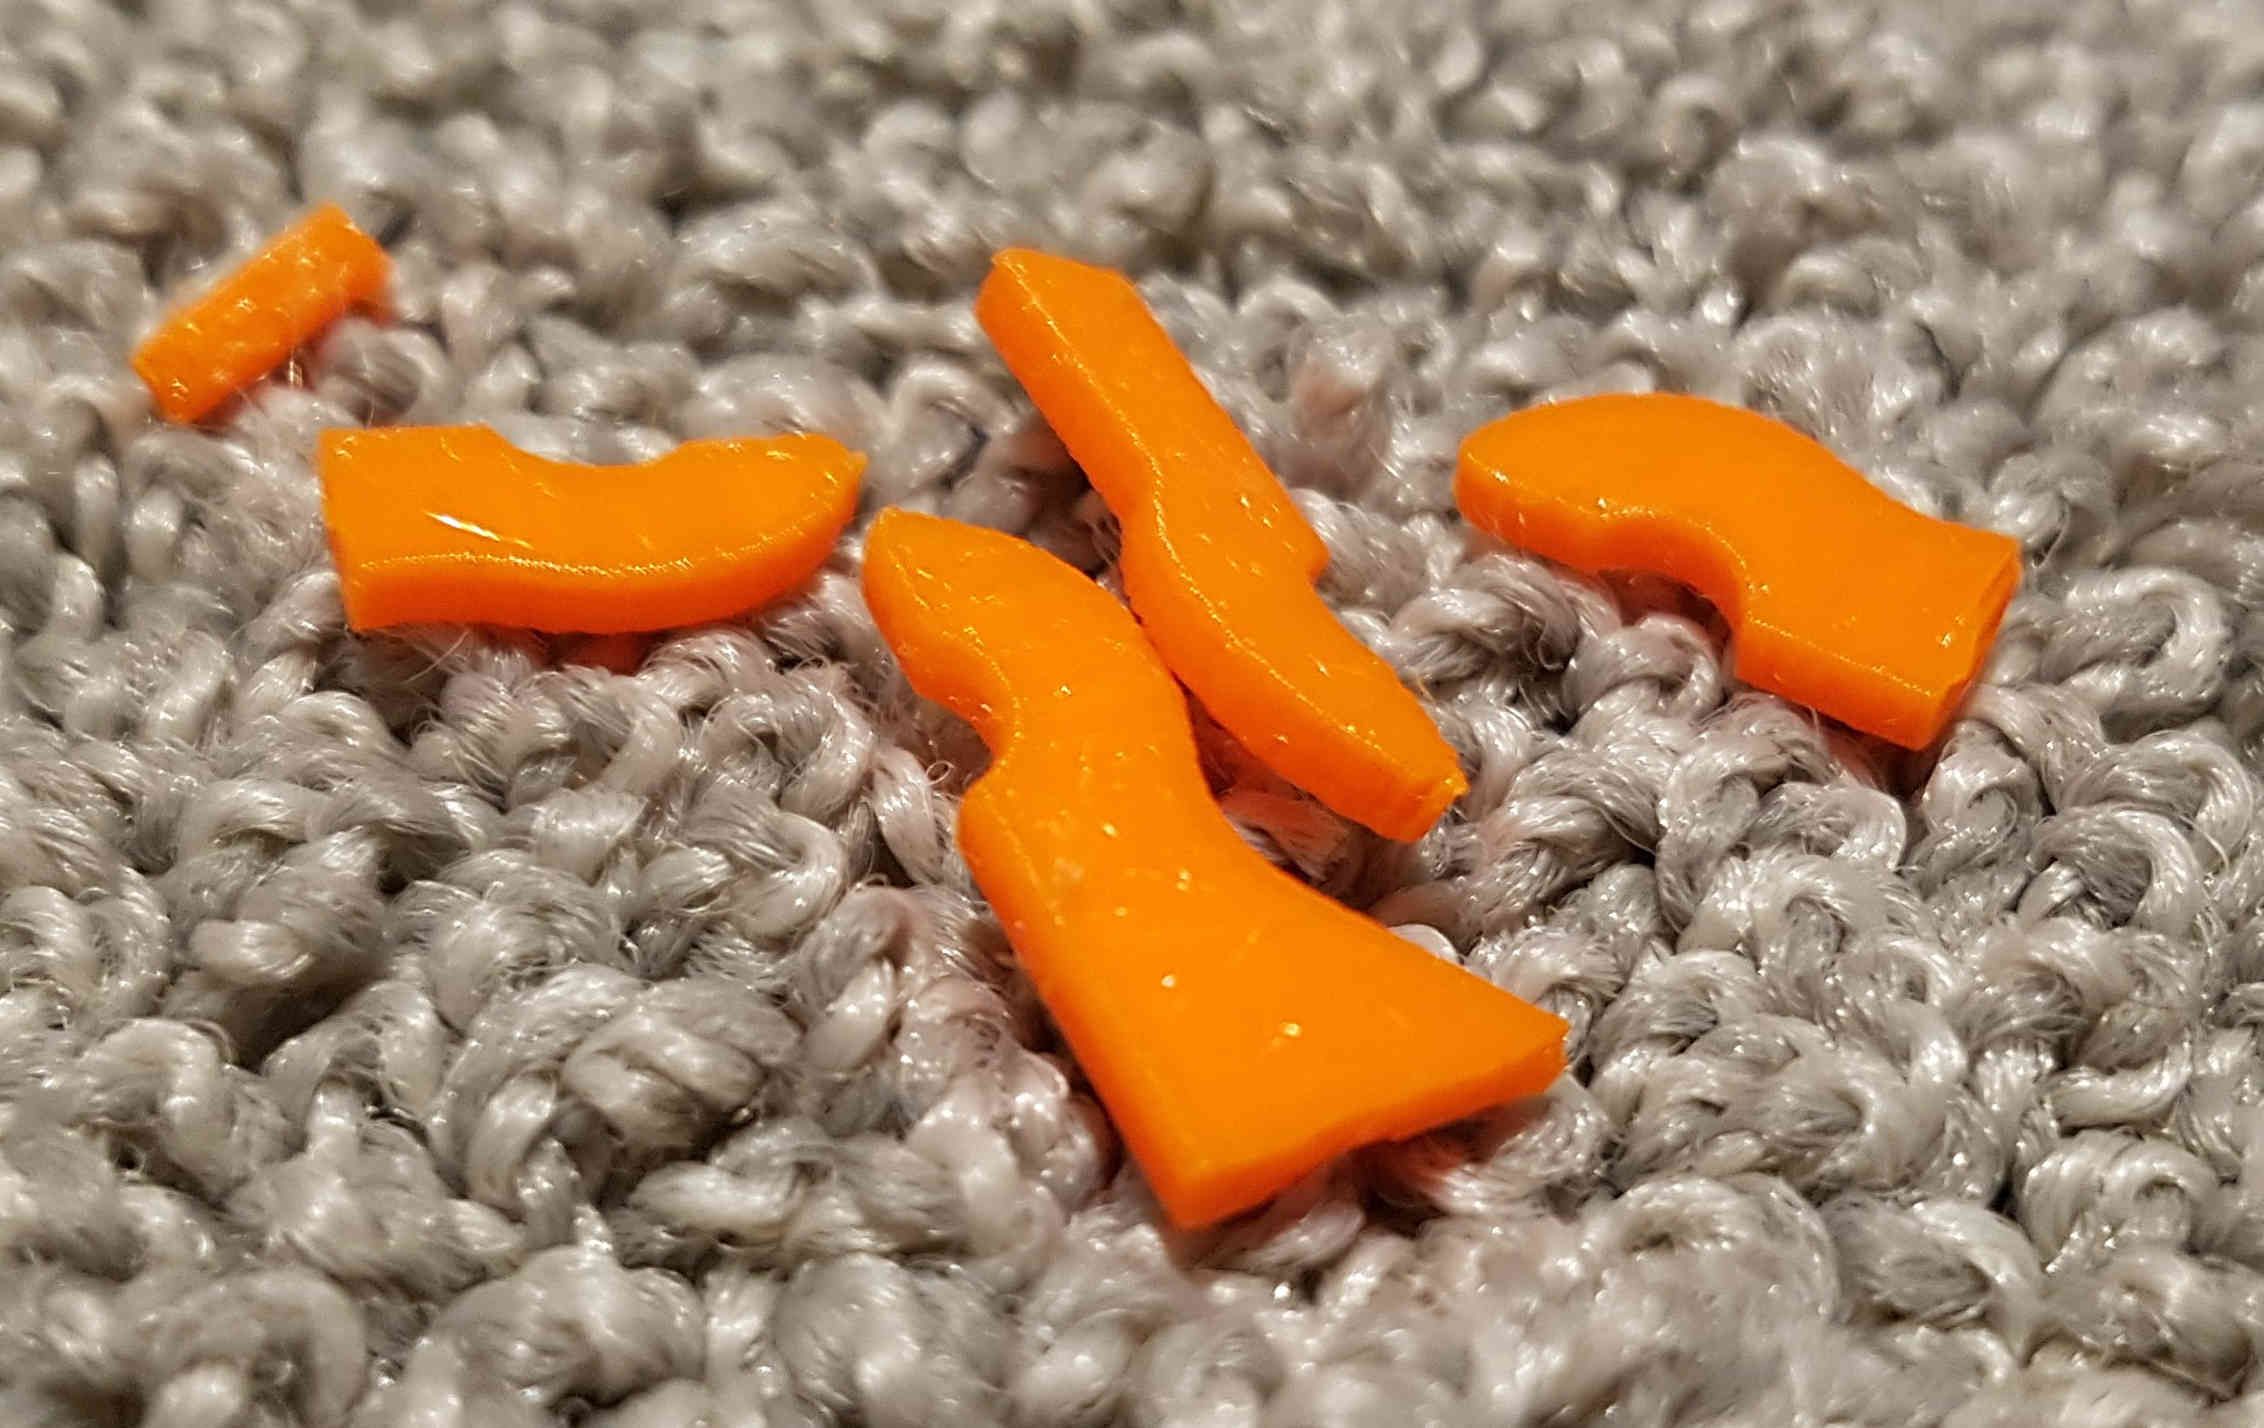 A pile of broken wheel clips.
It was at this point I reevaluated my plans. I decided that being able to disassemble it isn’t important at all and redesigned the wheel mount how it should have been from the start. The axle is simply pressed into a hole and glued there.
 The wheel axle holes. The axle is inserted from the outside, and is glued in place.
  An installed wheel. It’s really strong.
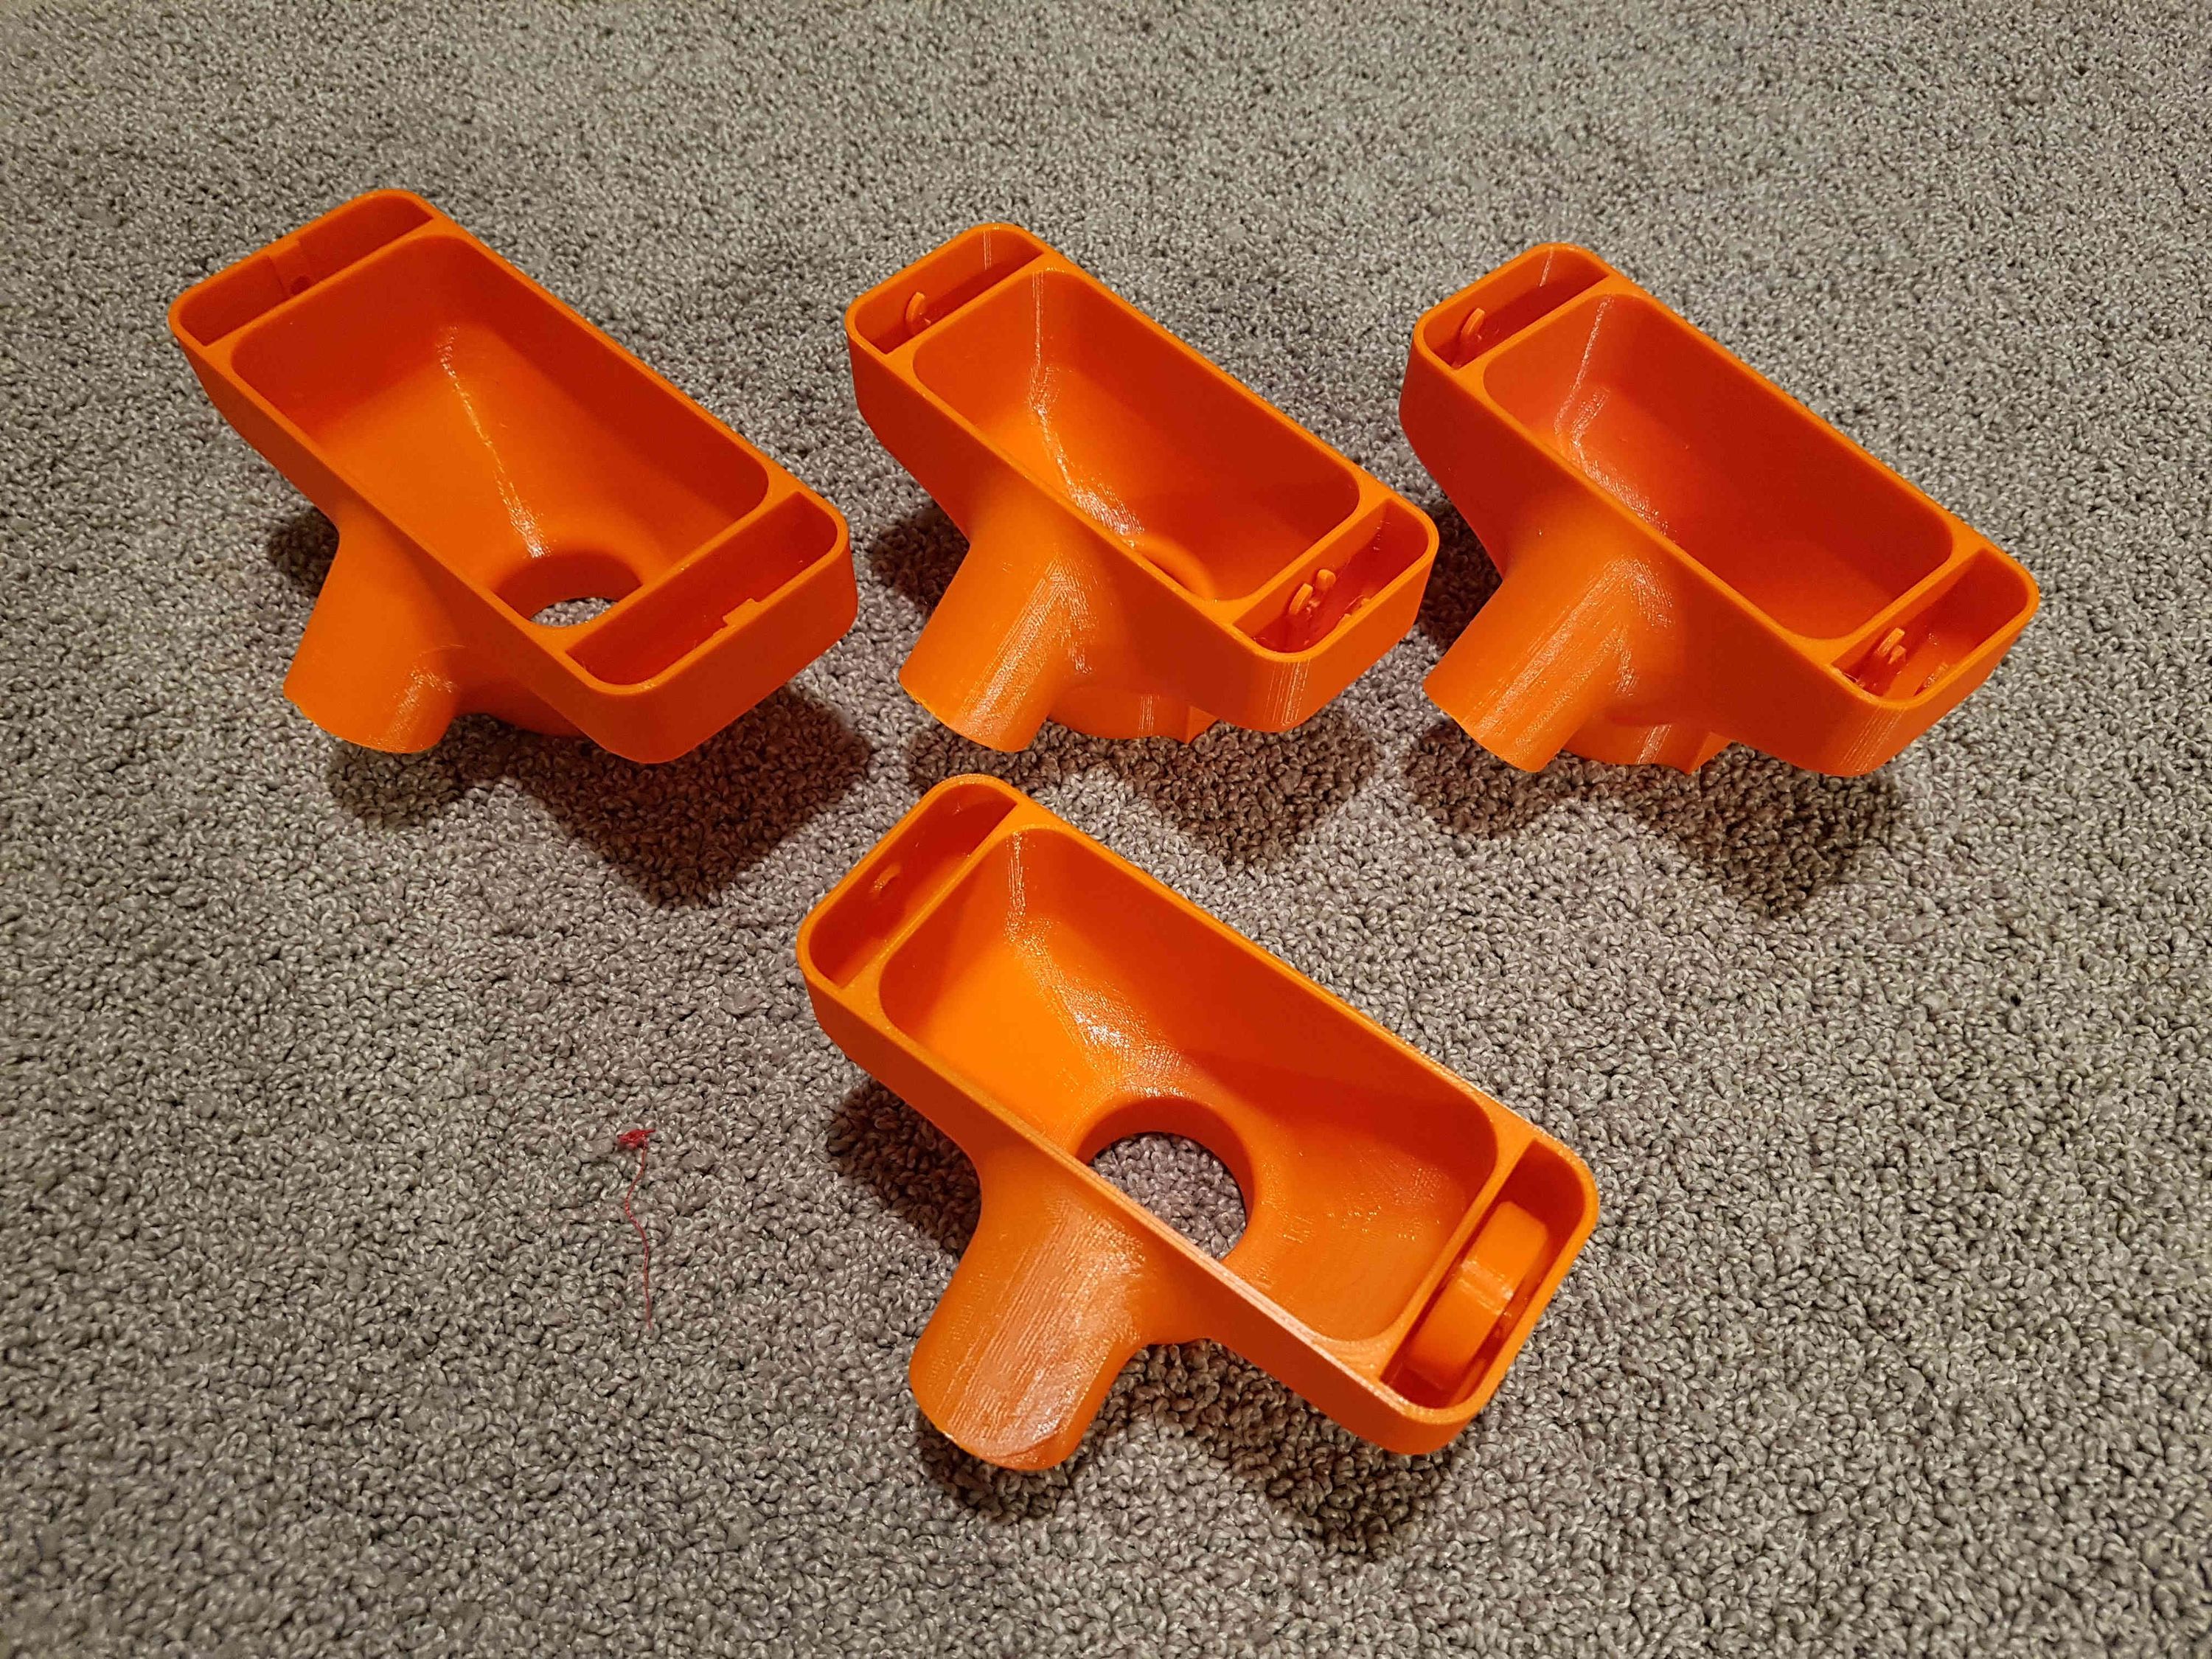 All of the bases I printed. Each was about a 10 hour print. The one at the bottom was the final one. You can see some of the broken clips in the top three.
With that out of the way, the last part was the handle. I bought a threaded telescopic handle that seemed pretty sturdy. It had a weird tapered thread on it that has a circular profile and a 4 mm thread pitch. I modeled up the mating thread and printed it. The base was designed with a hex mount so that it is independent of the thread. You have to print an adapter from the thread to the hex. Modeling and printing the thread was pretty pain free apart from my first version being for a left hand thread. The handle has a right hand thread.
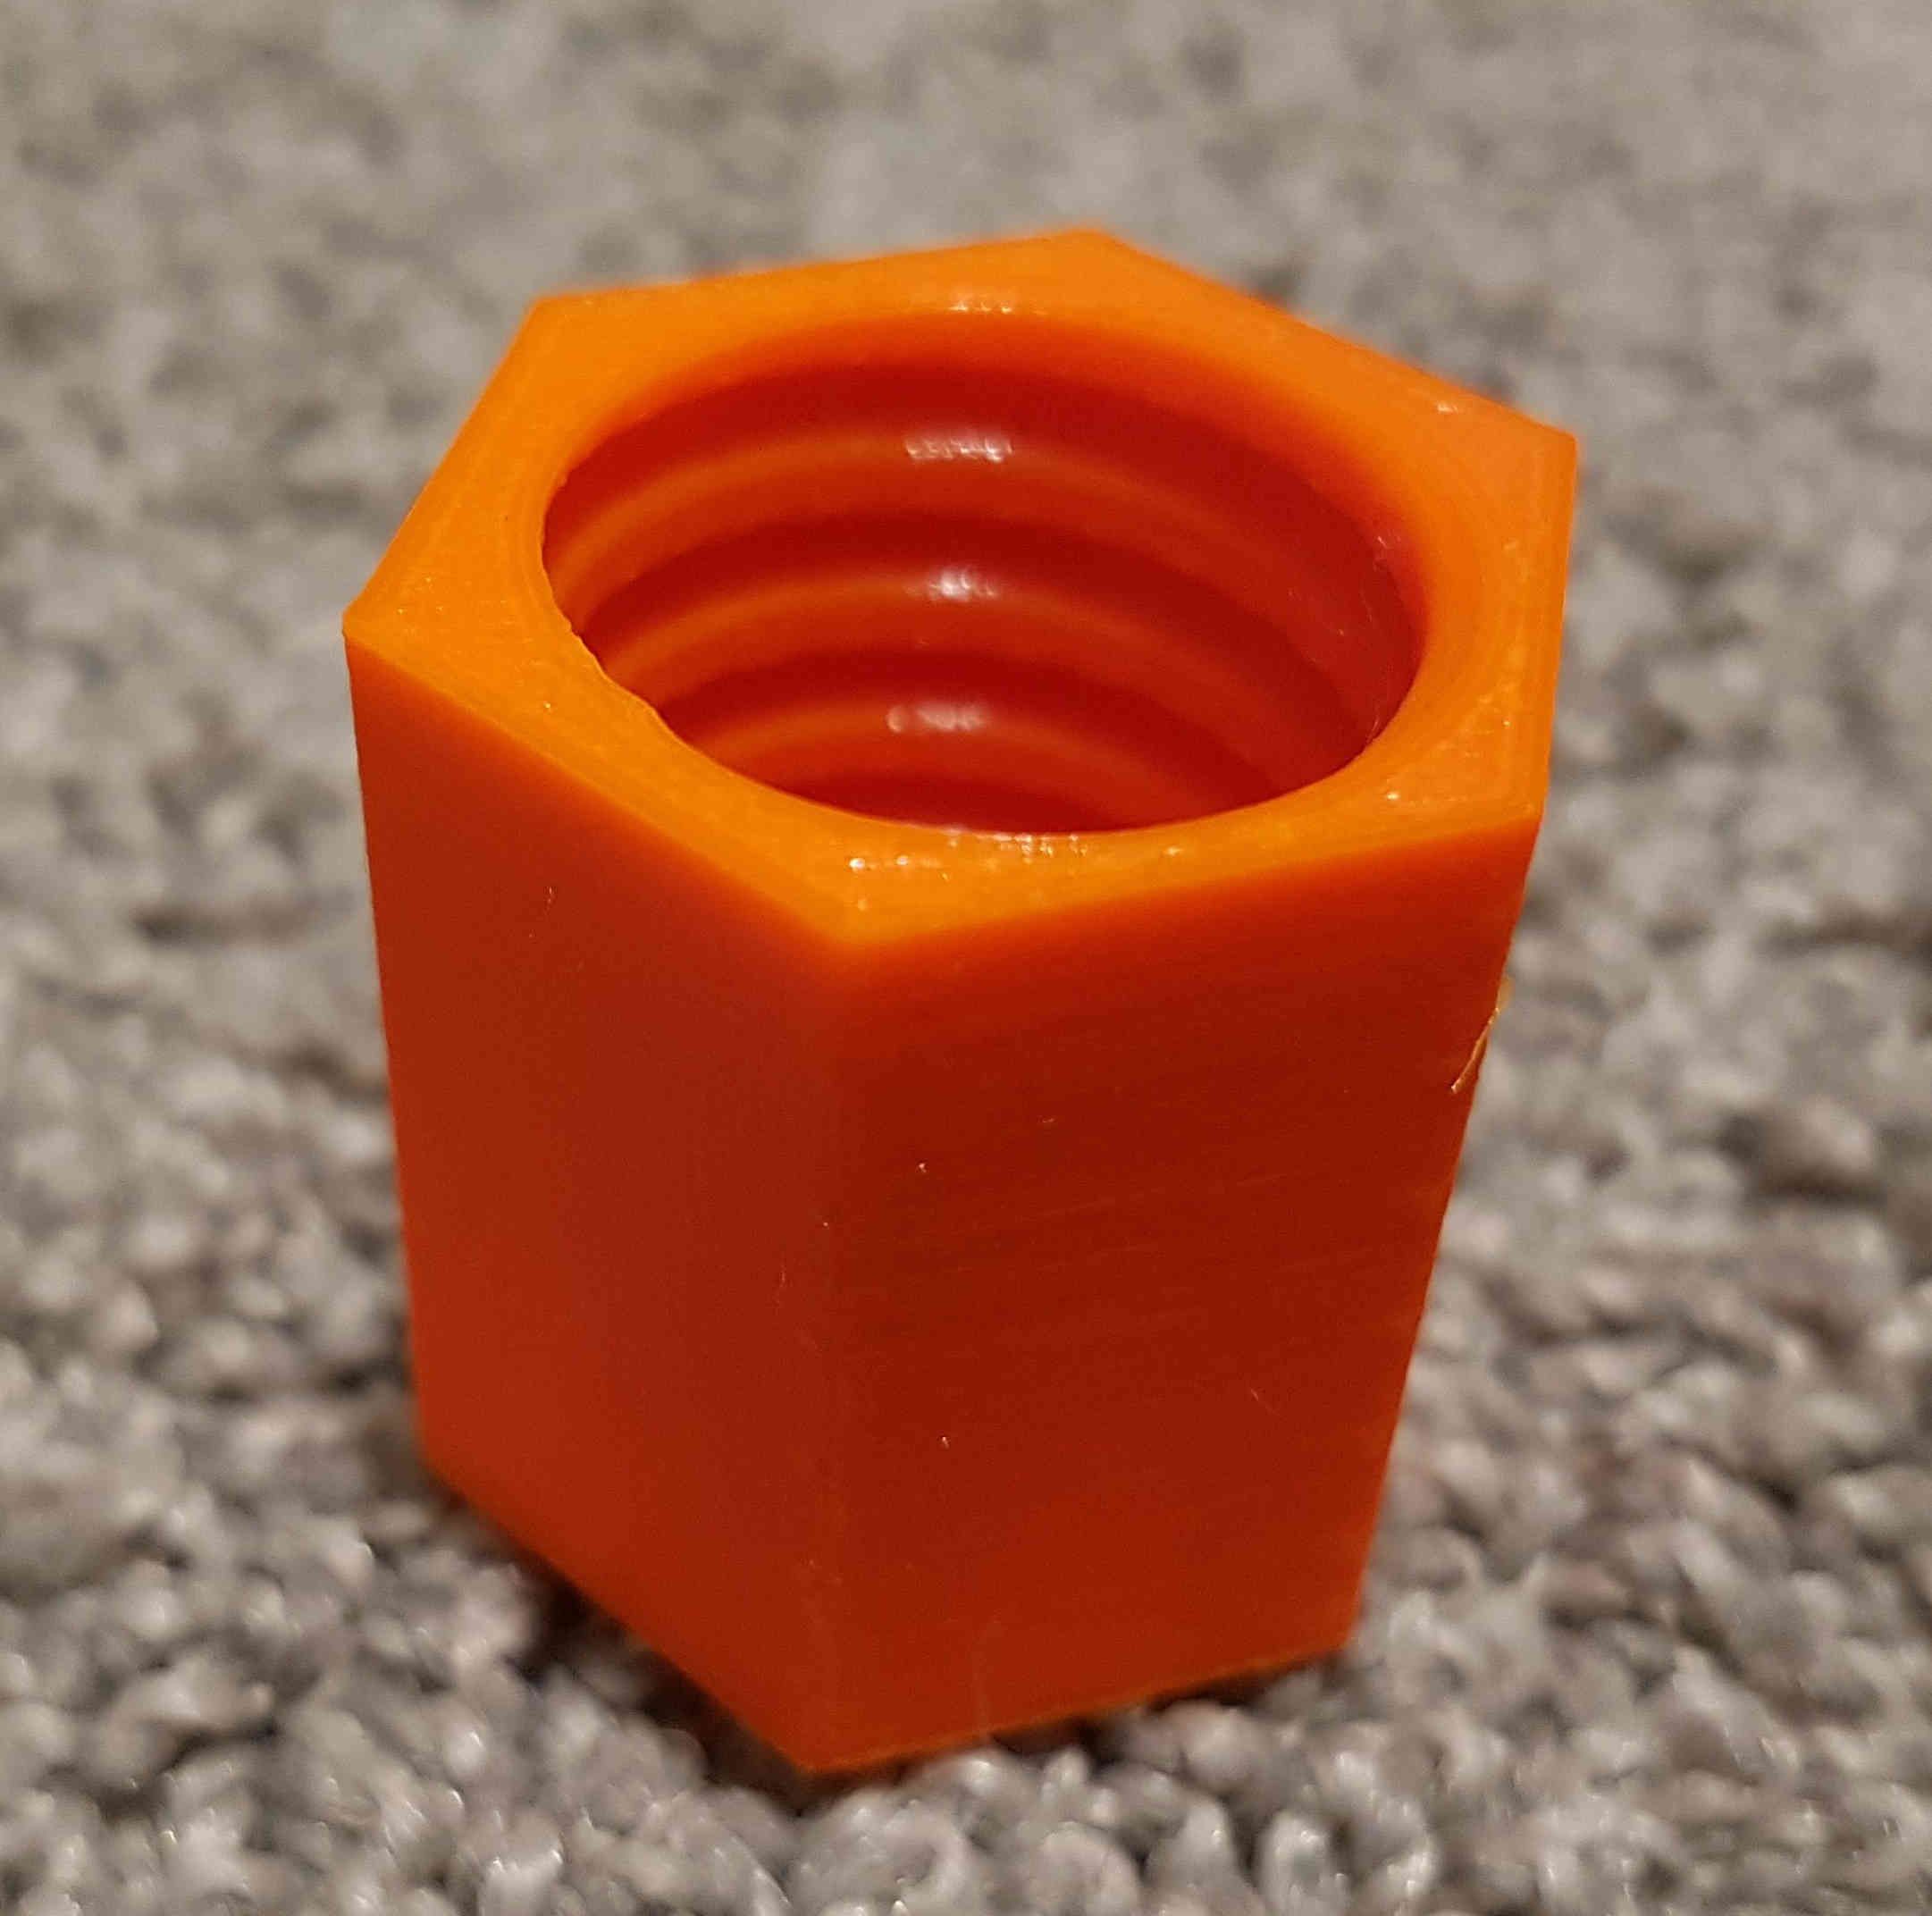 The handle mount. Thread on the inside, hex on the outside.
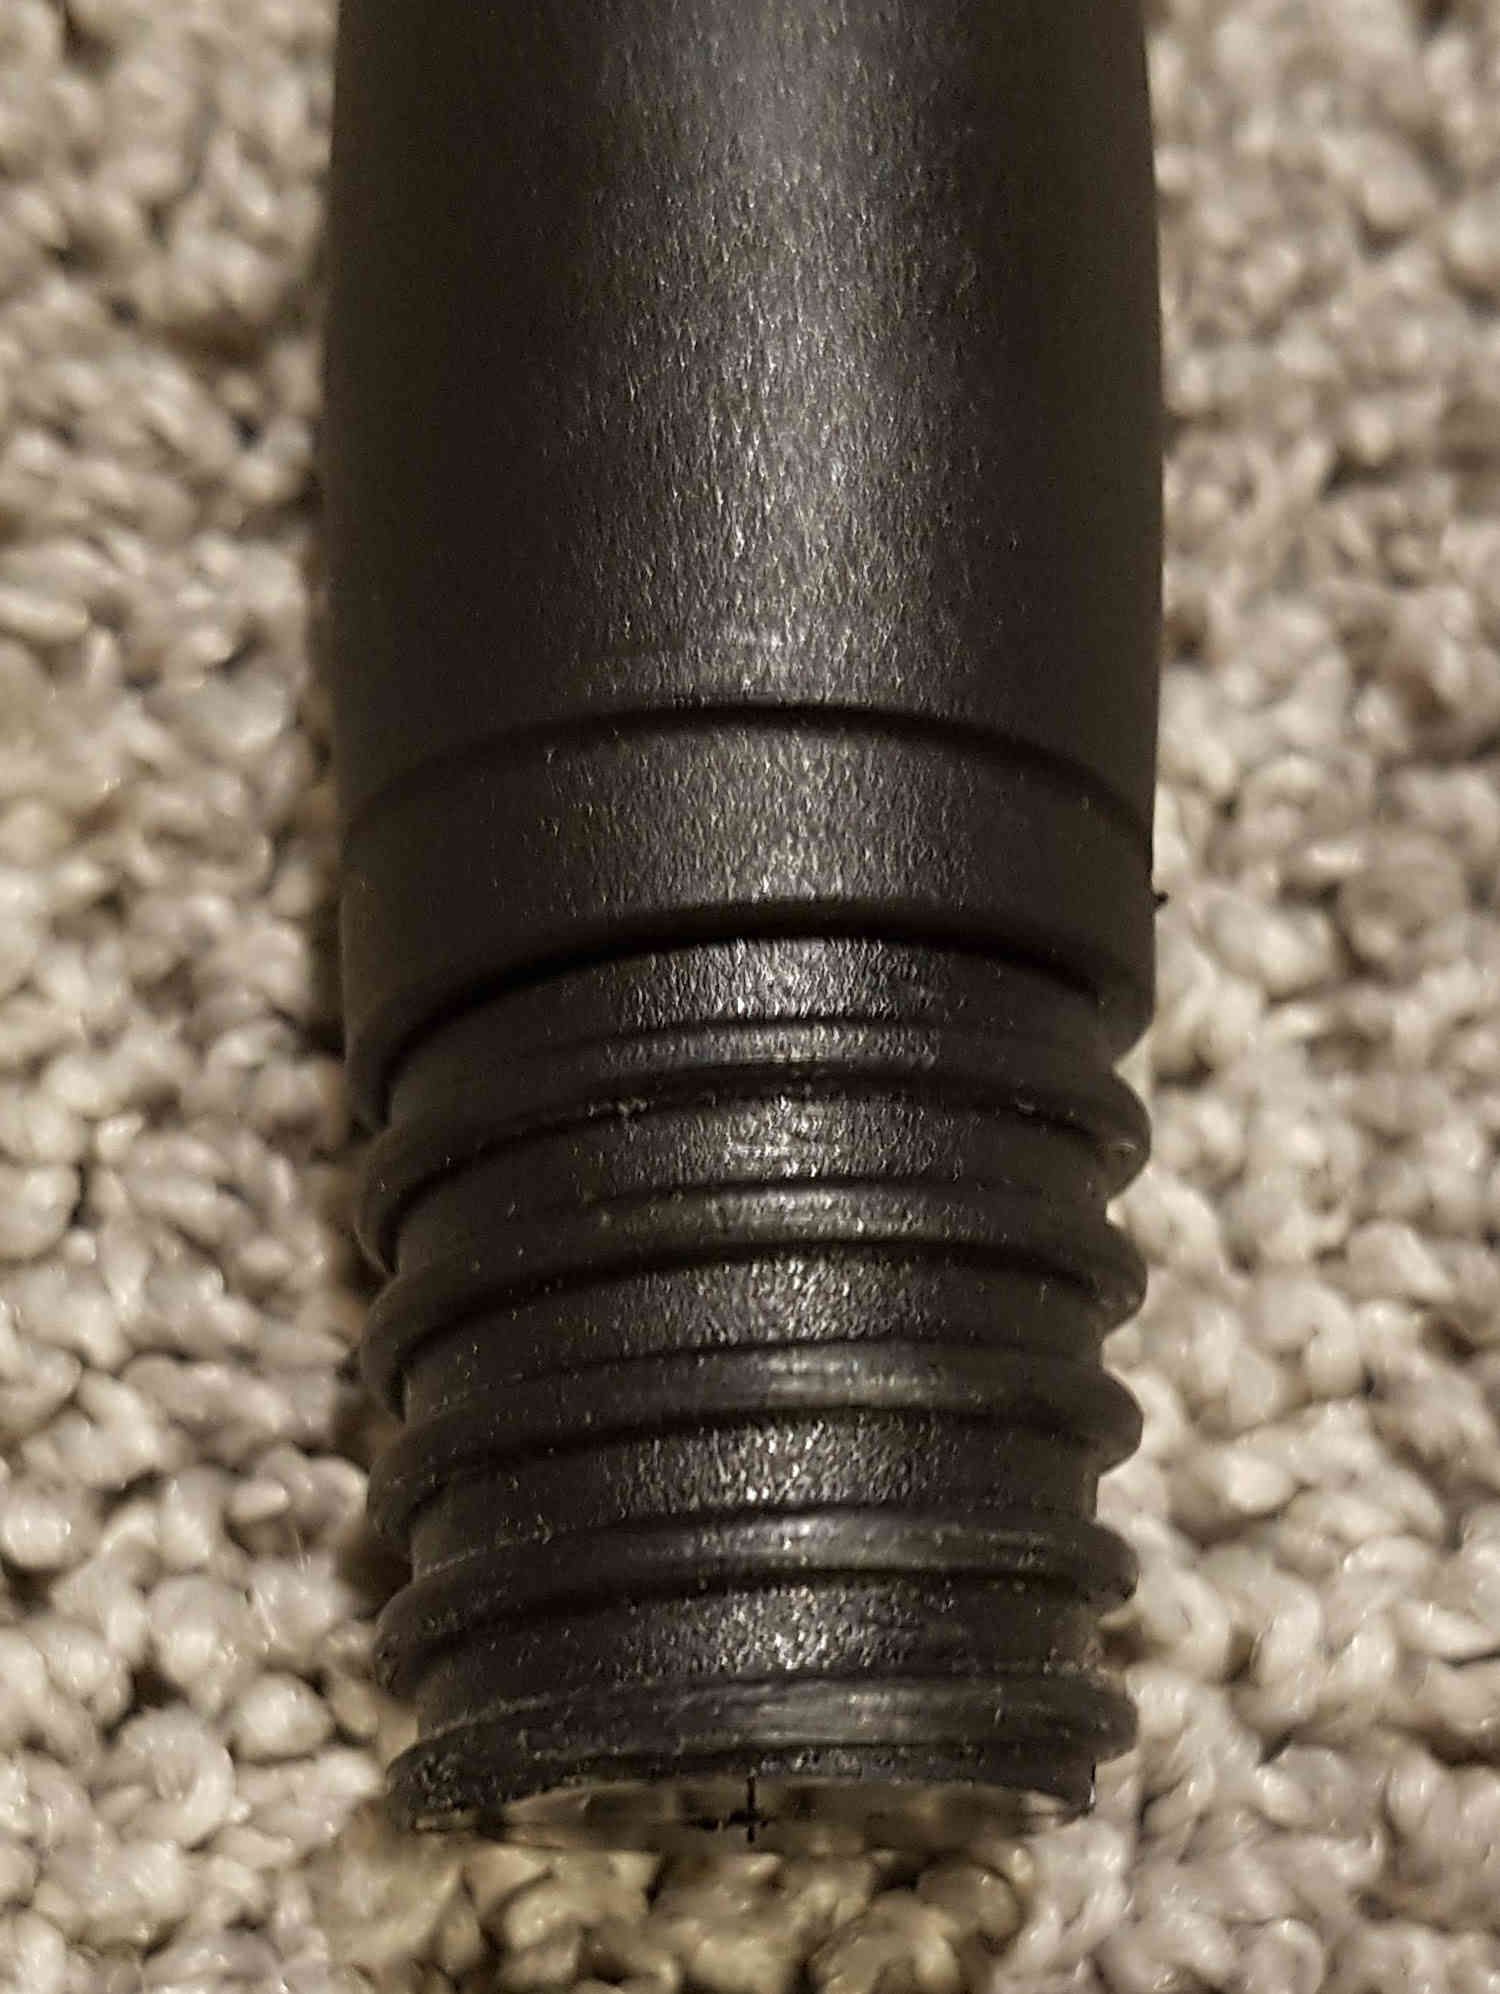 The thread that was on the end of the handle I bought. Notice the slight taper.
With all the parts printed, I assembled it. All the joints got plenty of super glue. Everything fit together well and the glue joints all seem to be more than strong enough.
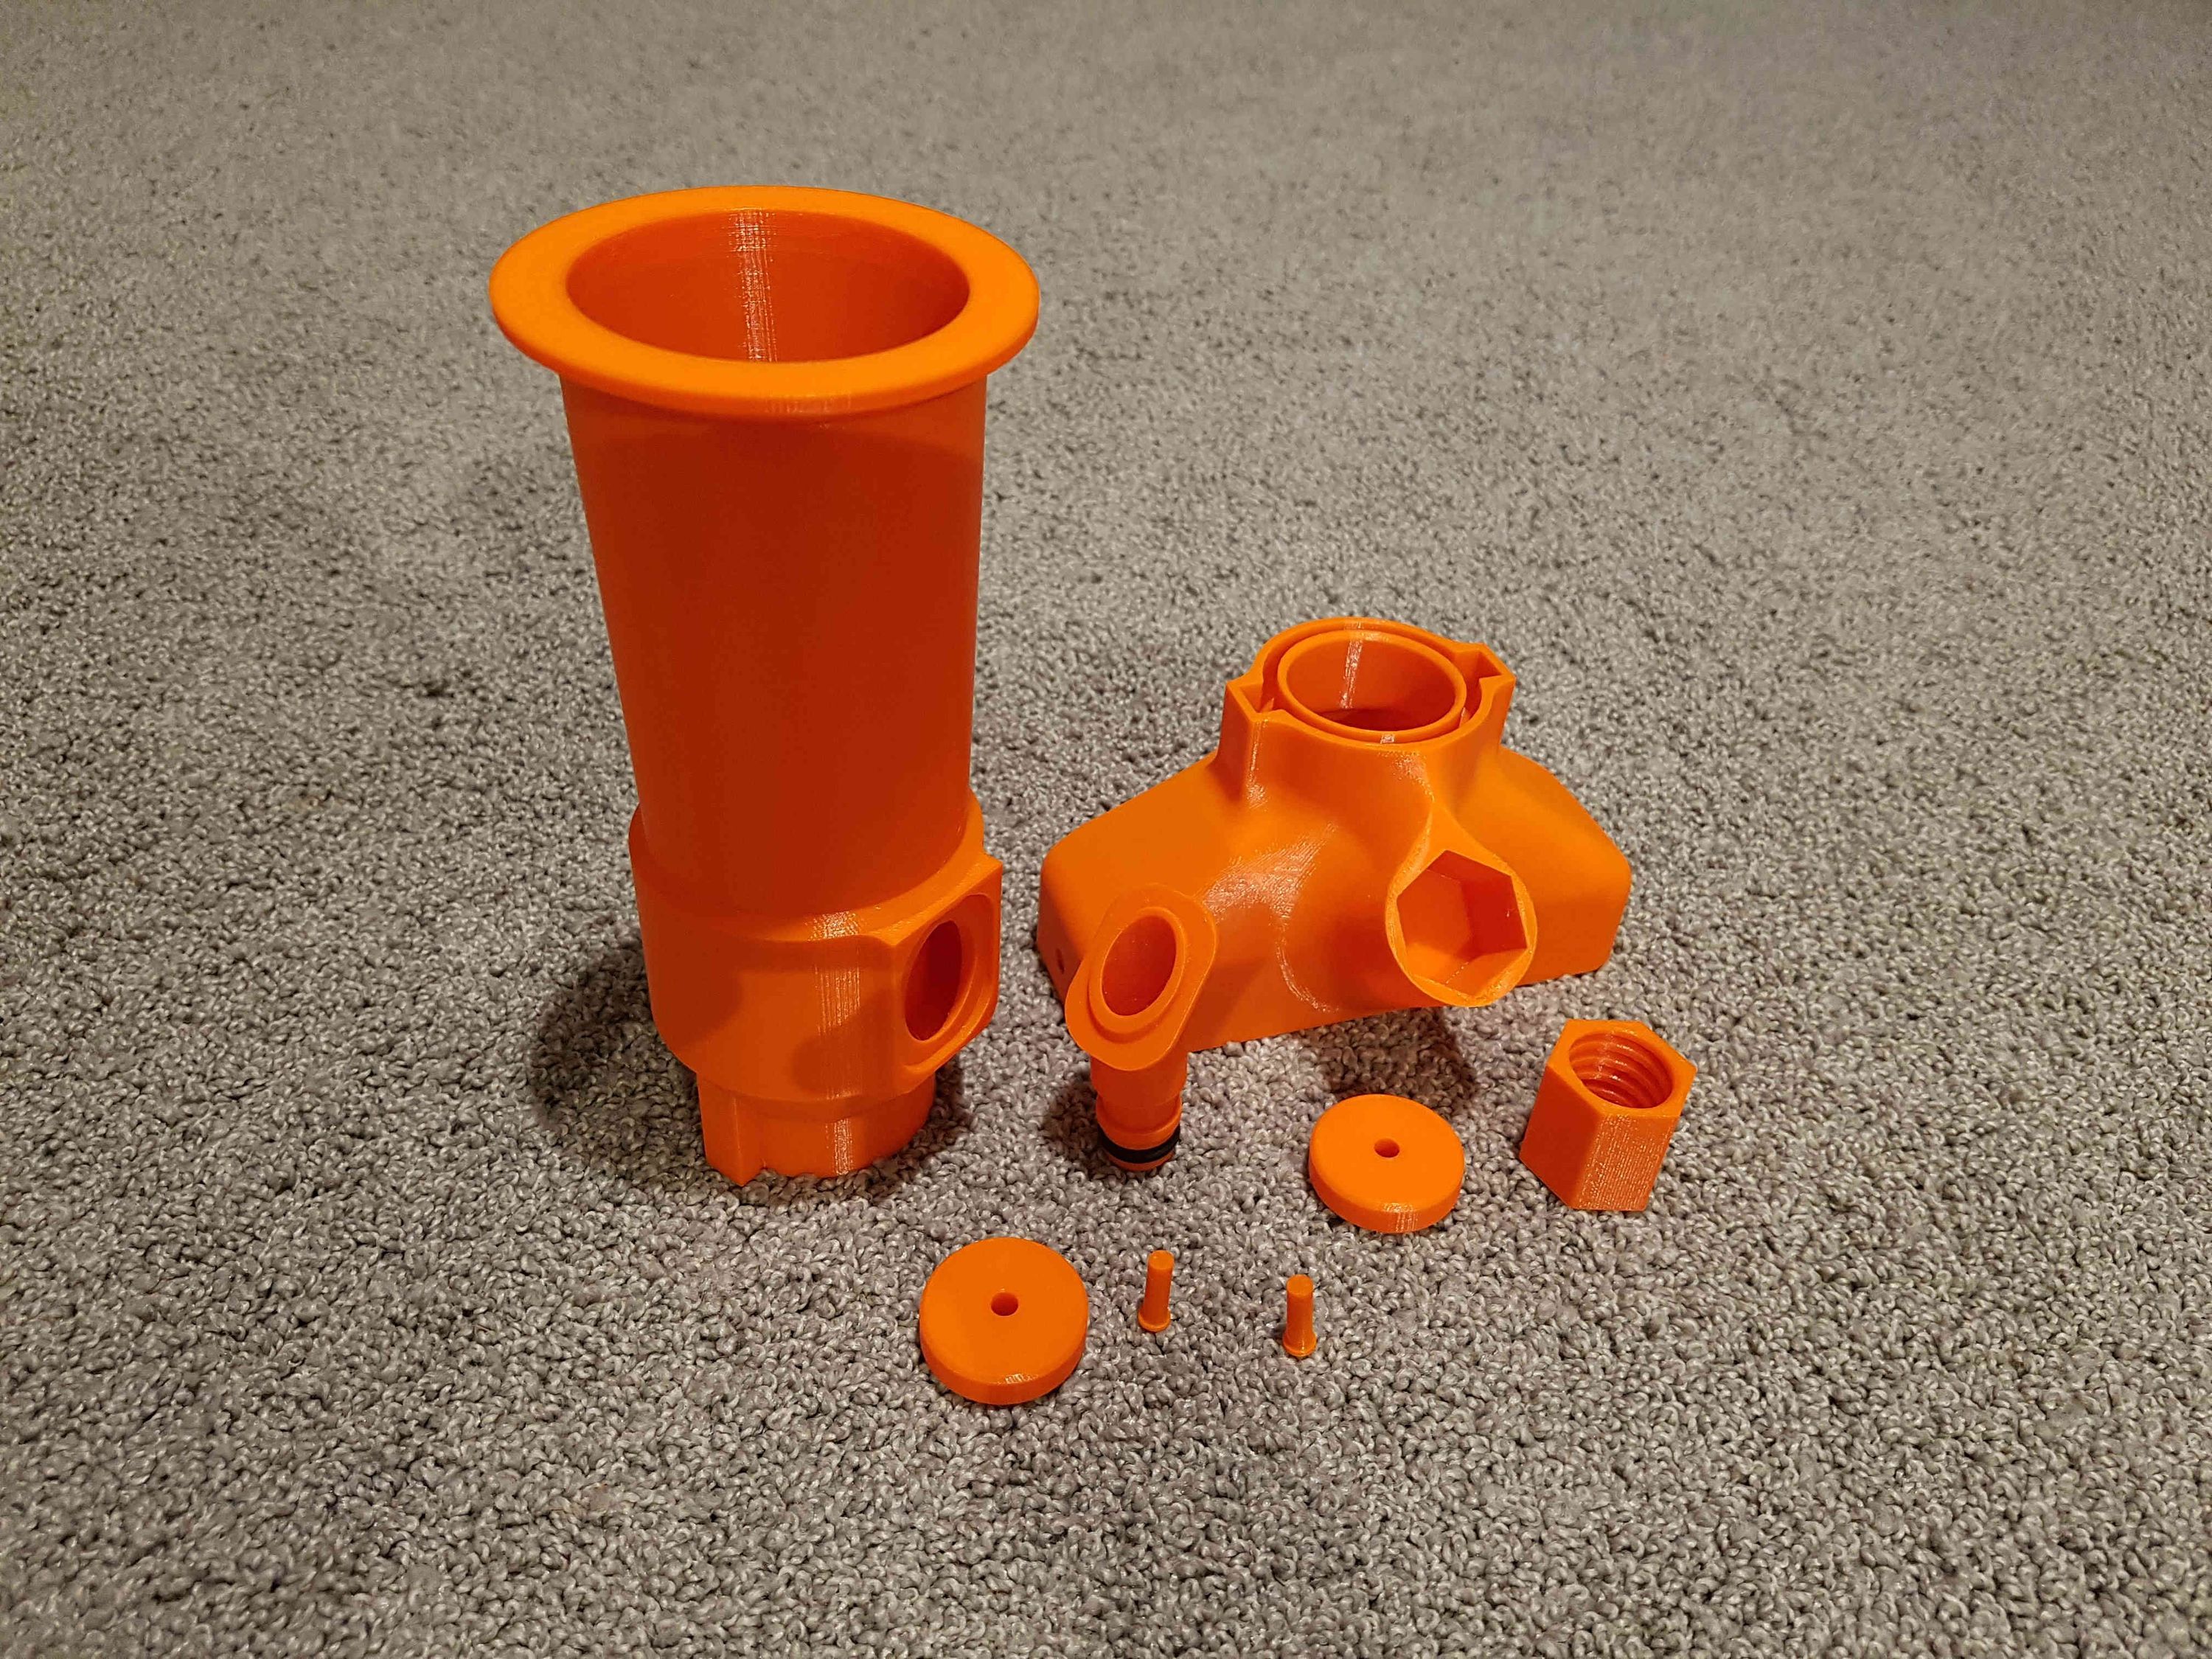 All of the parts before assembly.
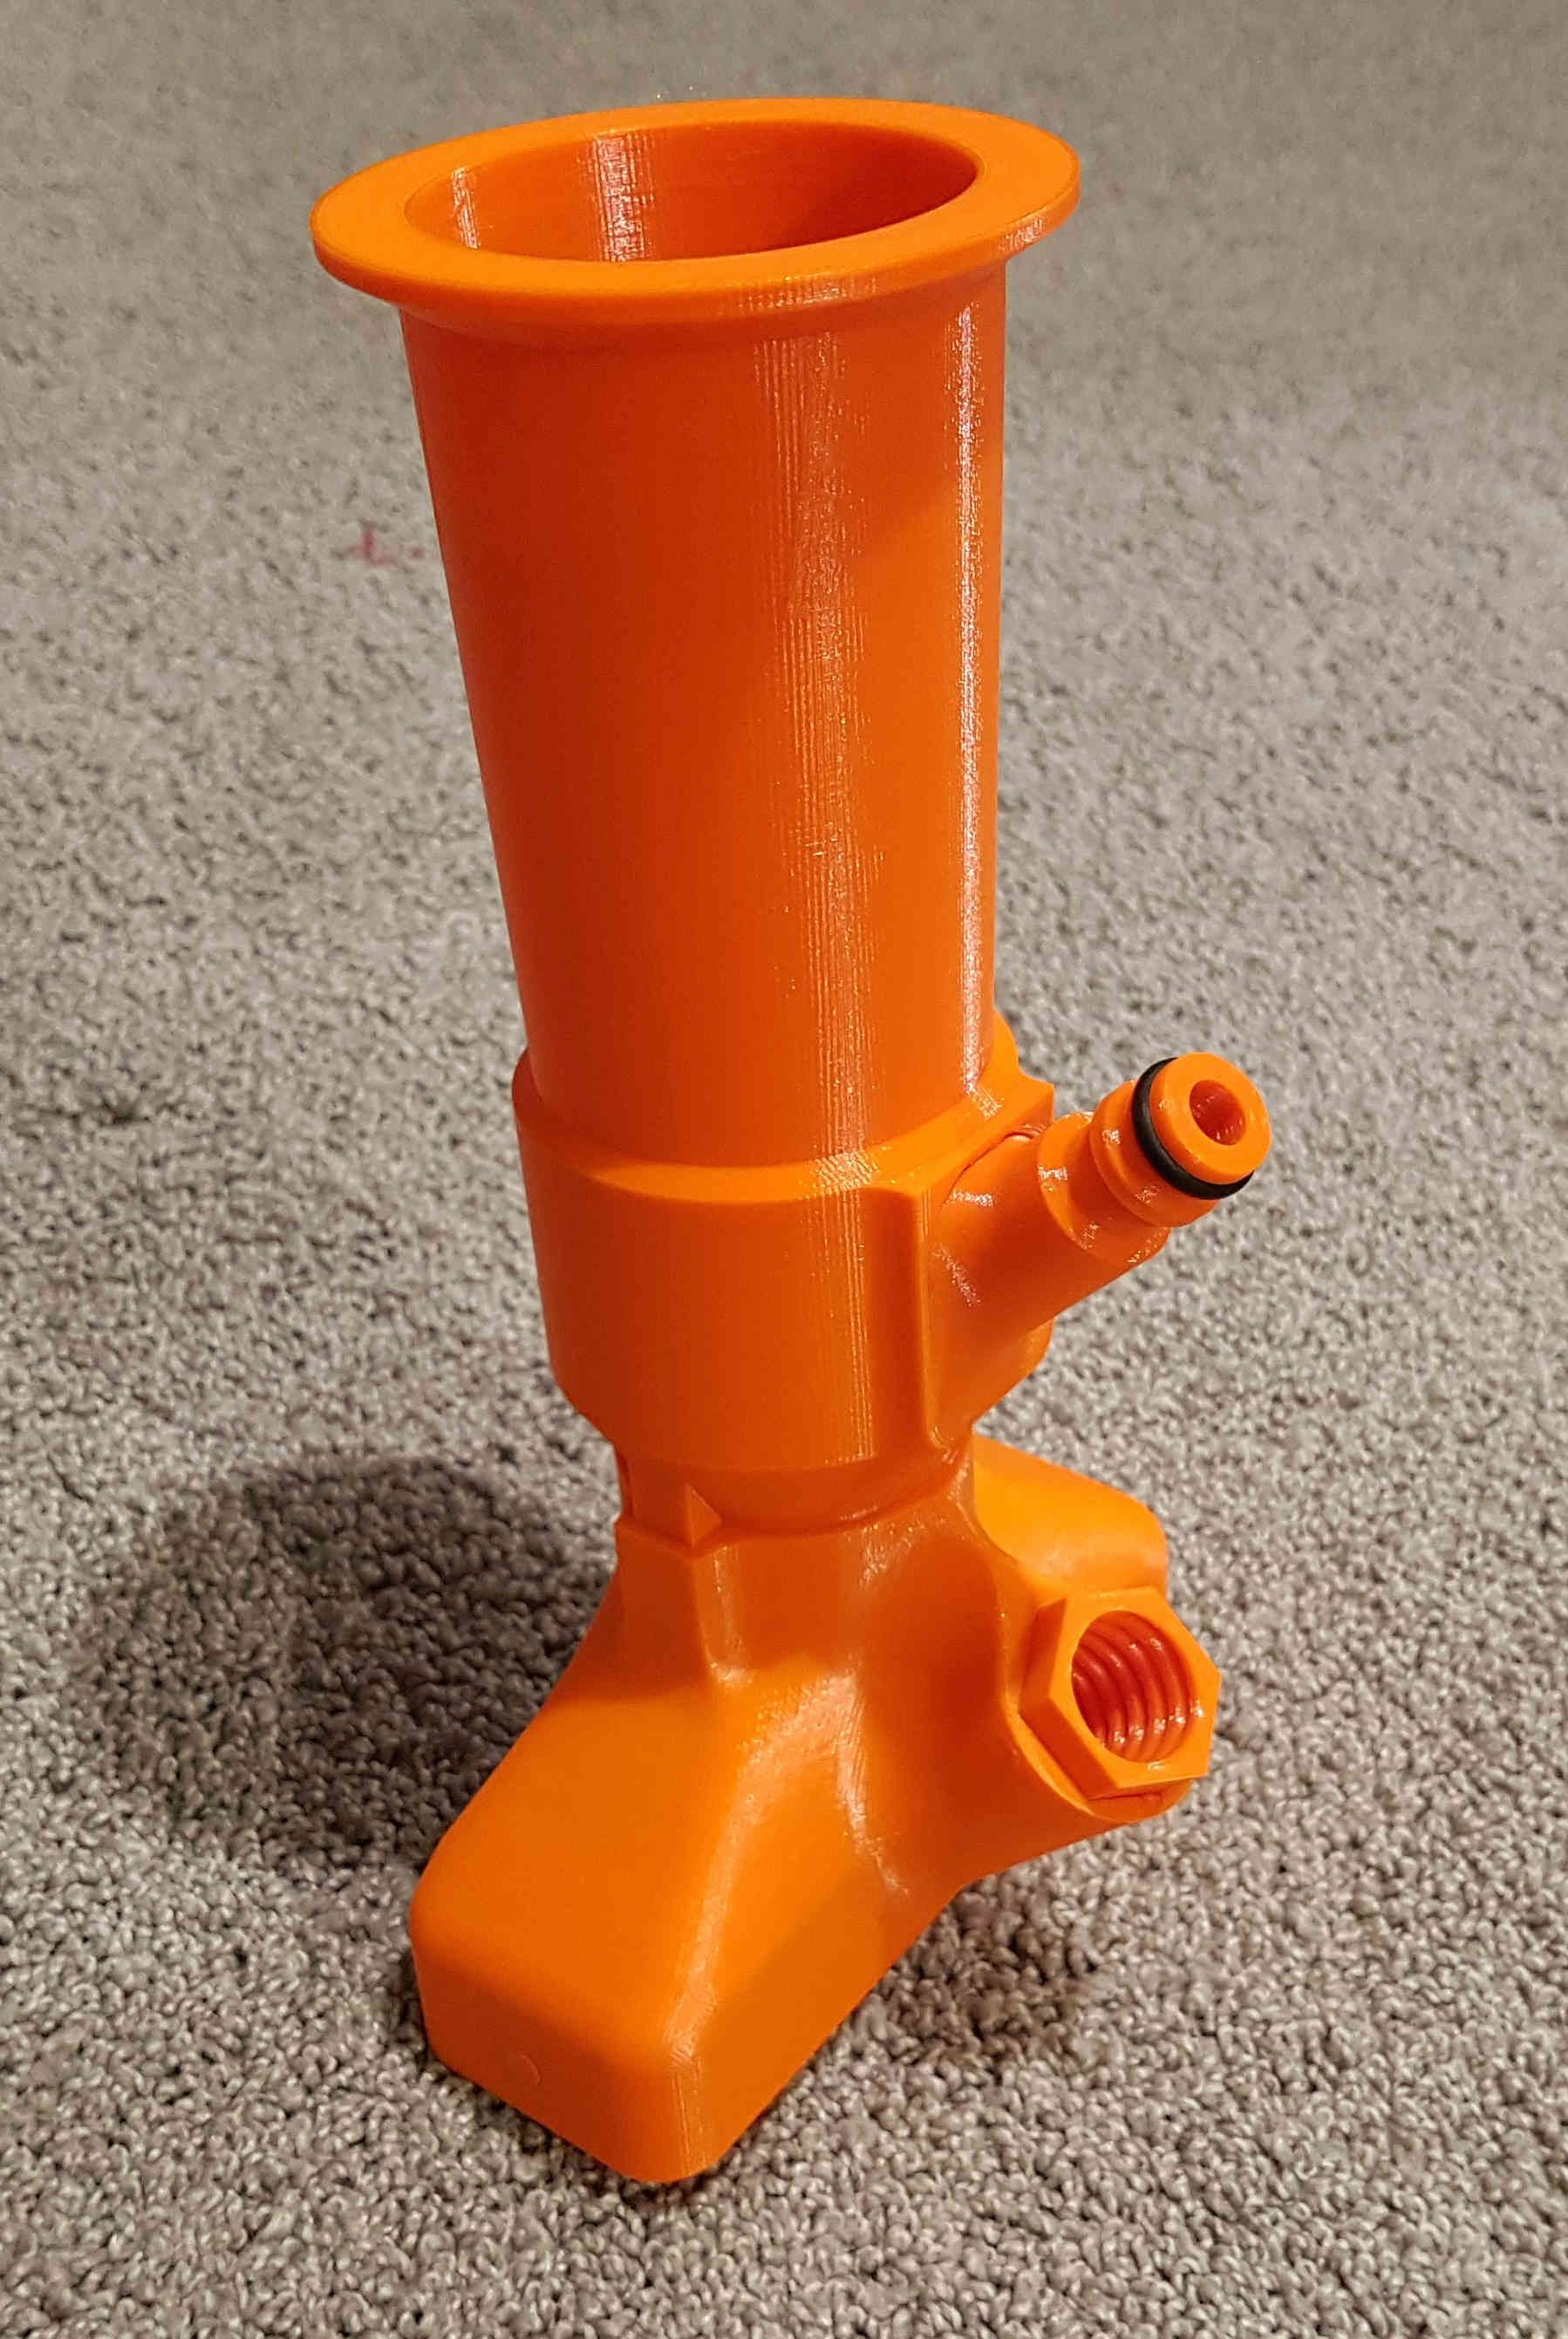 The finished pool cleaner.
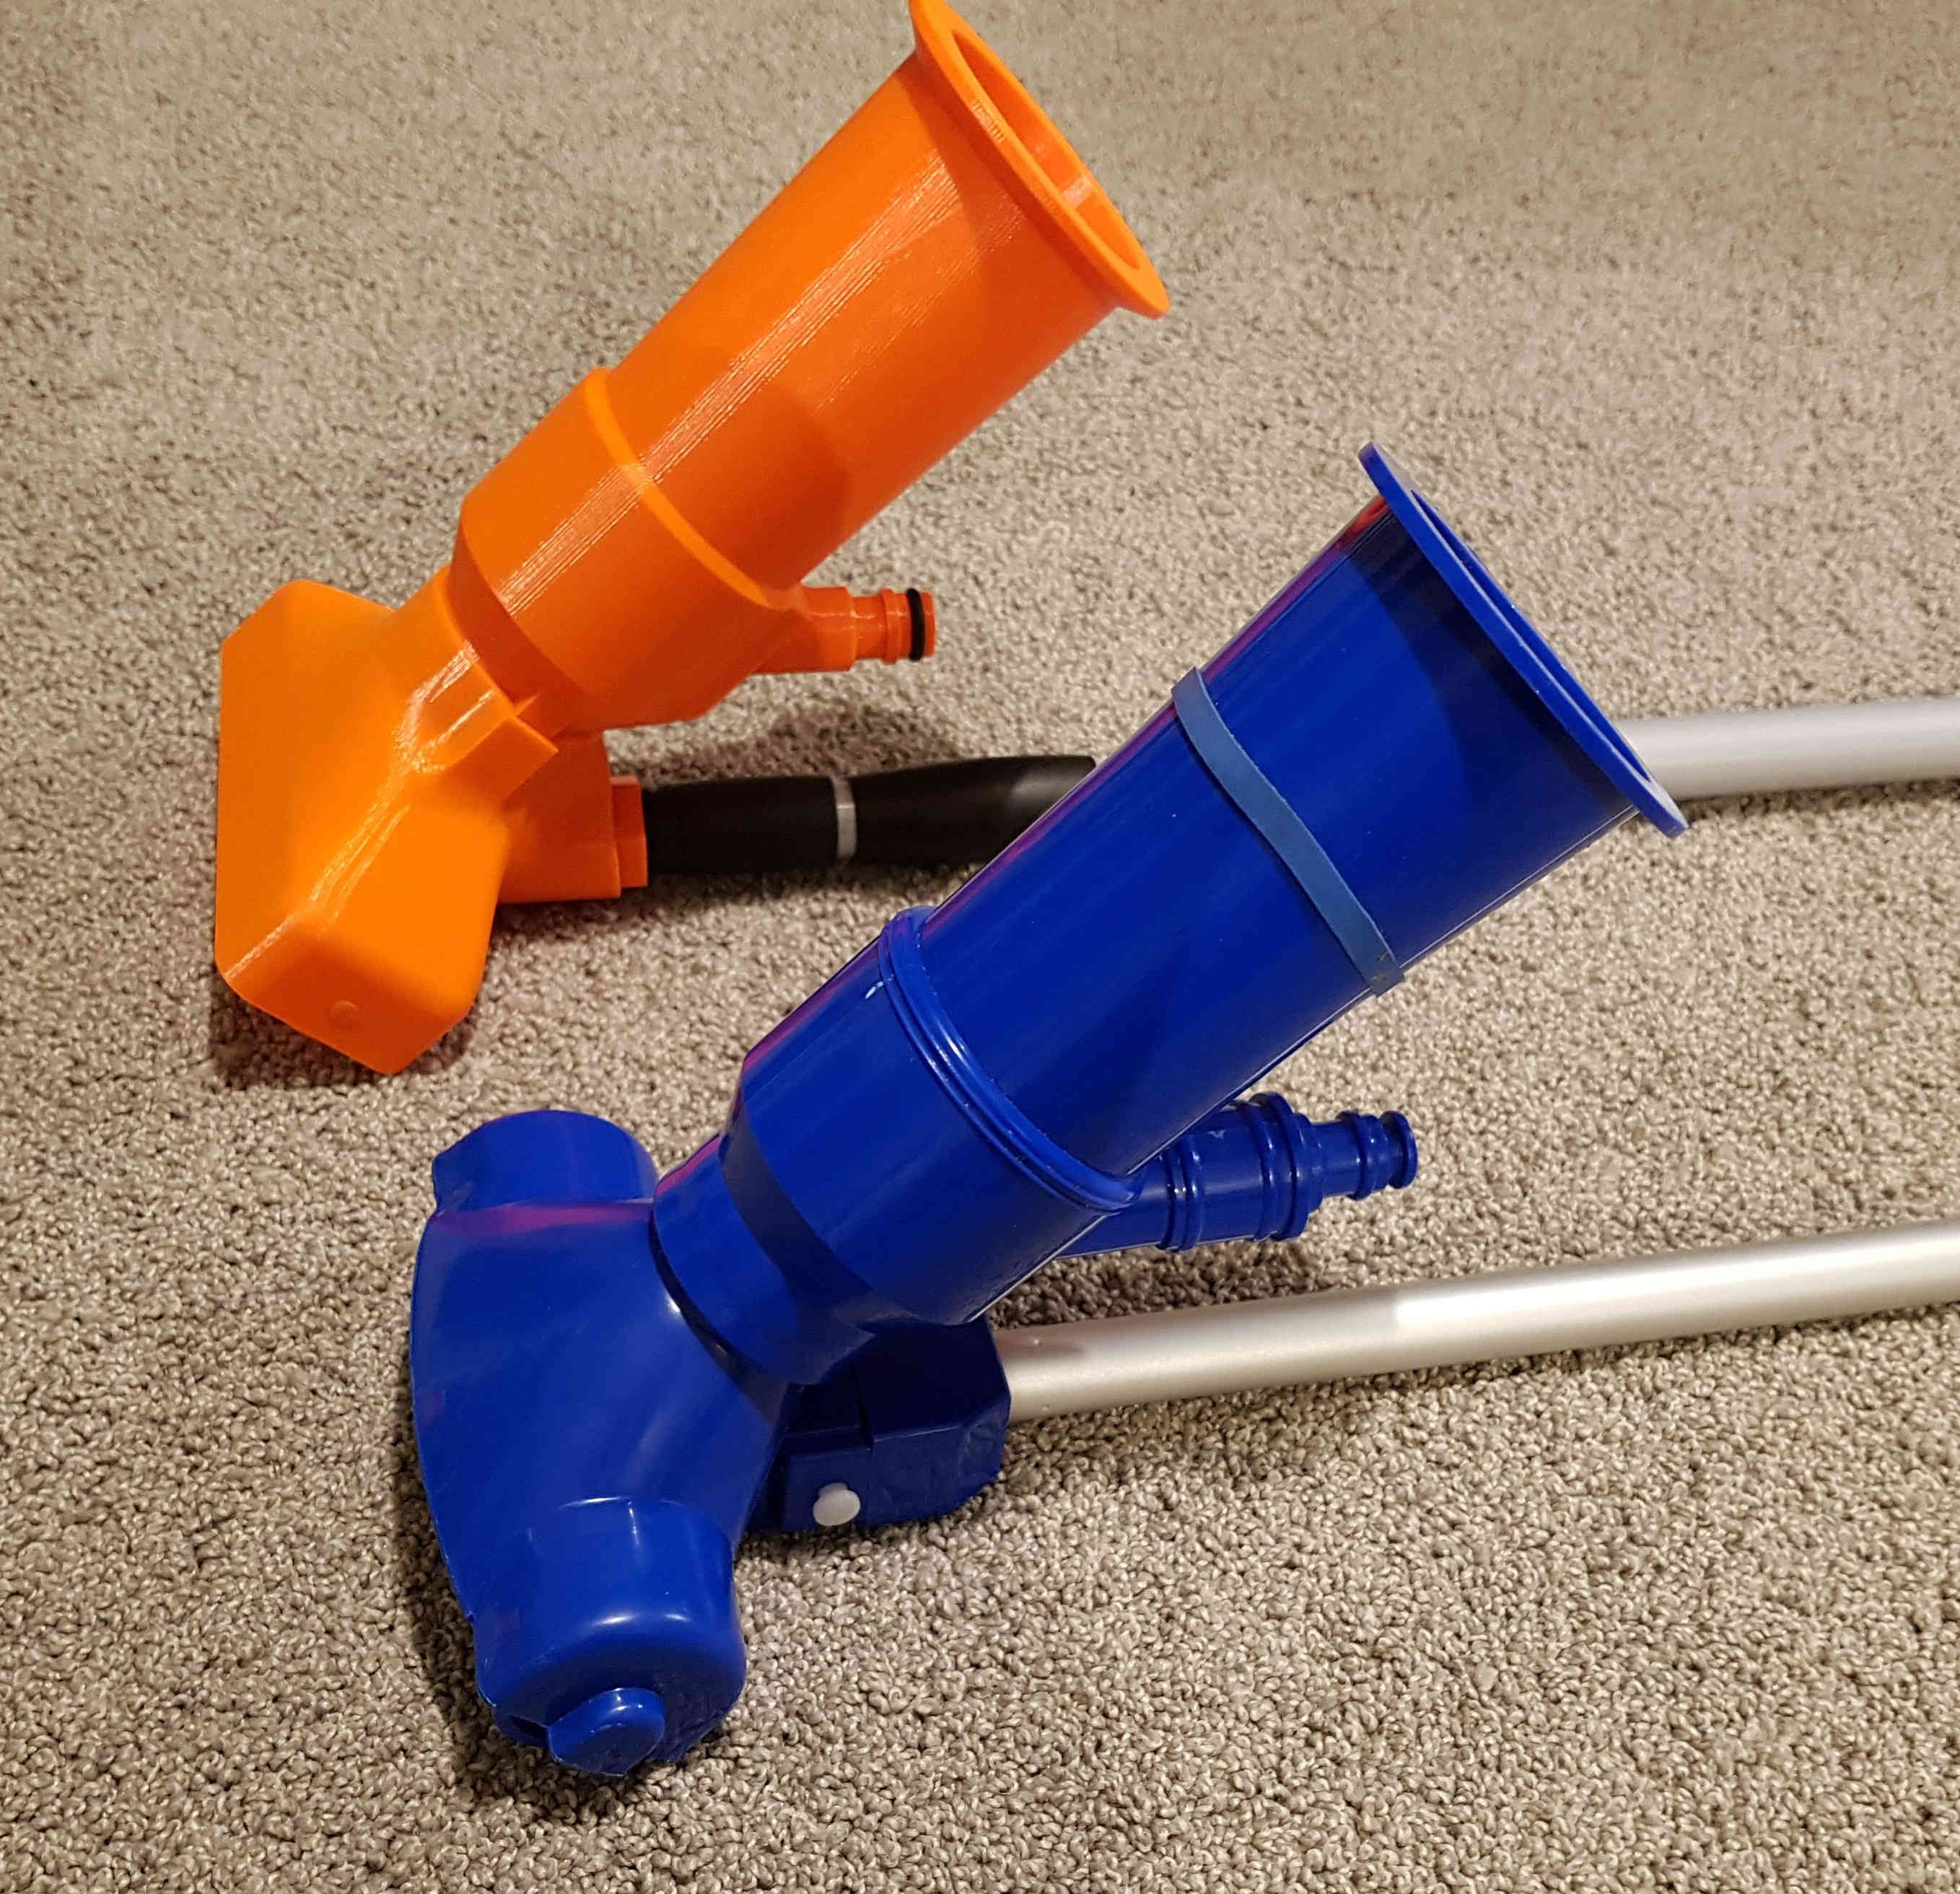 The old pool cleaner next to the new one.
The final product turned out really well. My friend has tested it out in her pond and claims that her goldfish have never been happier. She likes the sturdiness of the new cleaner compared to the old one. I learned a lot in the process of designing and building the cleaner and even though the breaking wheel clips was very frustrating, it was a fun project. Solidworks and STL files are available on Github.
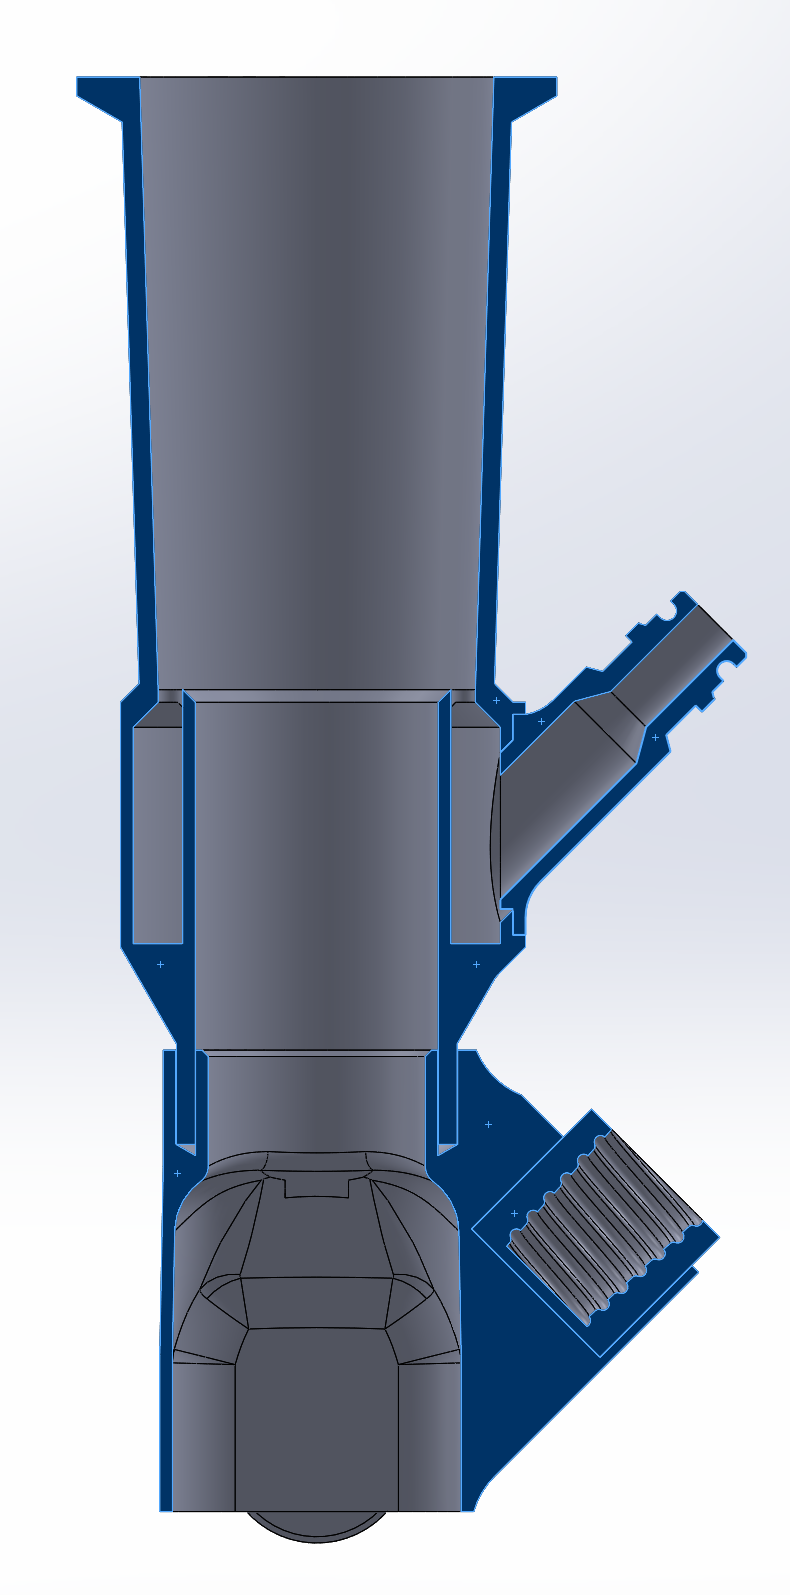 A cross section of the pool cleaner. You can see the cavity that the water from the hose goes into.
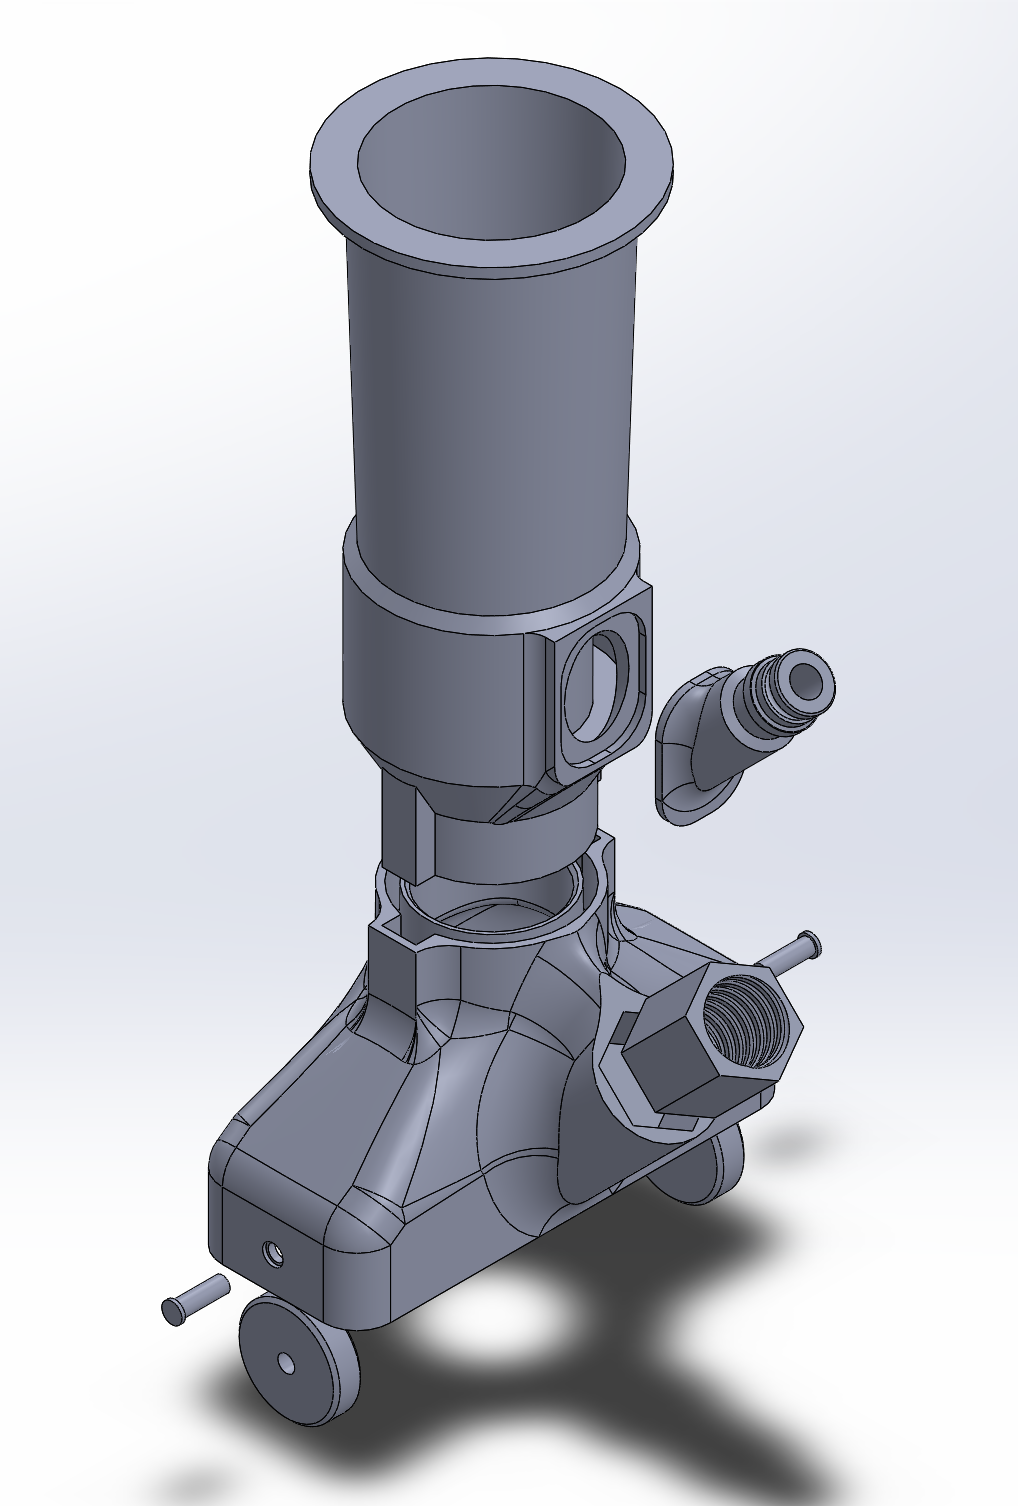 An exploded view of the pool cleaner showing how each of the parts fits together.
 The same exploded model from a different angle.