|||
|||
A friend, Mark Jones, who I had worked with for a few years decided to move to Japan. I wanted to commemorate the work we had done and good times we’d had together by making him a medal. I didn’t want to just give him the medal, I wanted him to work for it, so I designed a bit of a treaure hunt in order for him to find the it. He’s also into escape rooms and that kind of thing so I thought a tresure hunt would be a good idea (and it was).
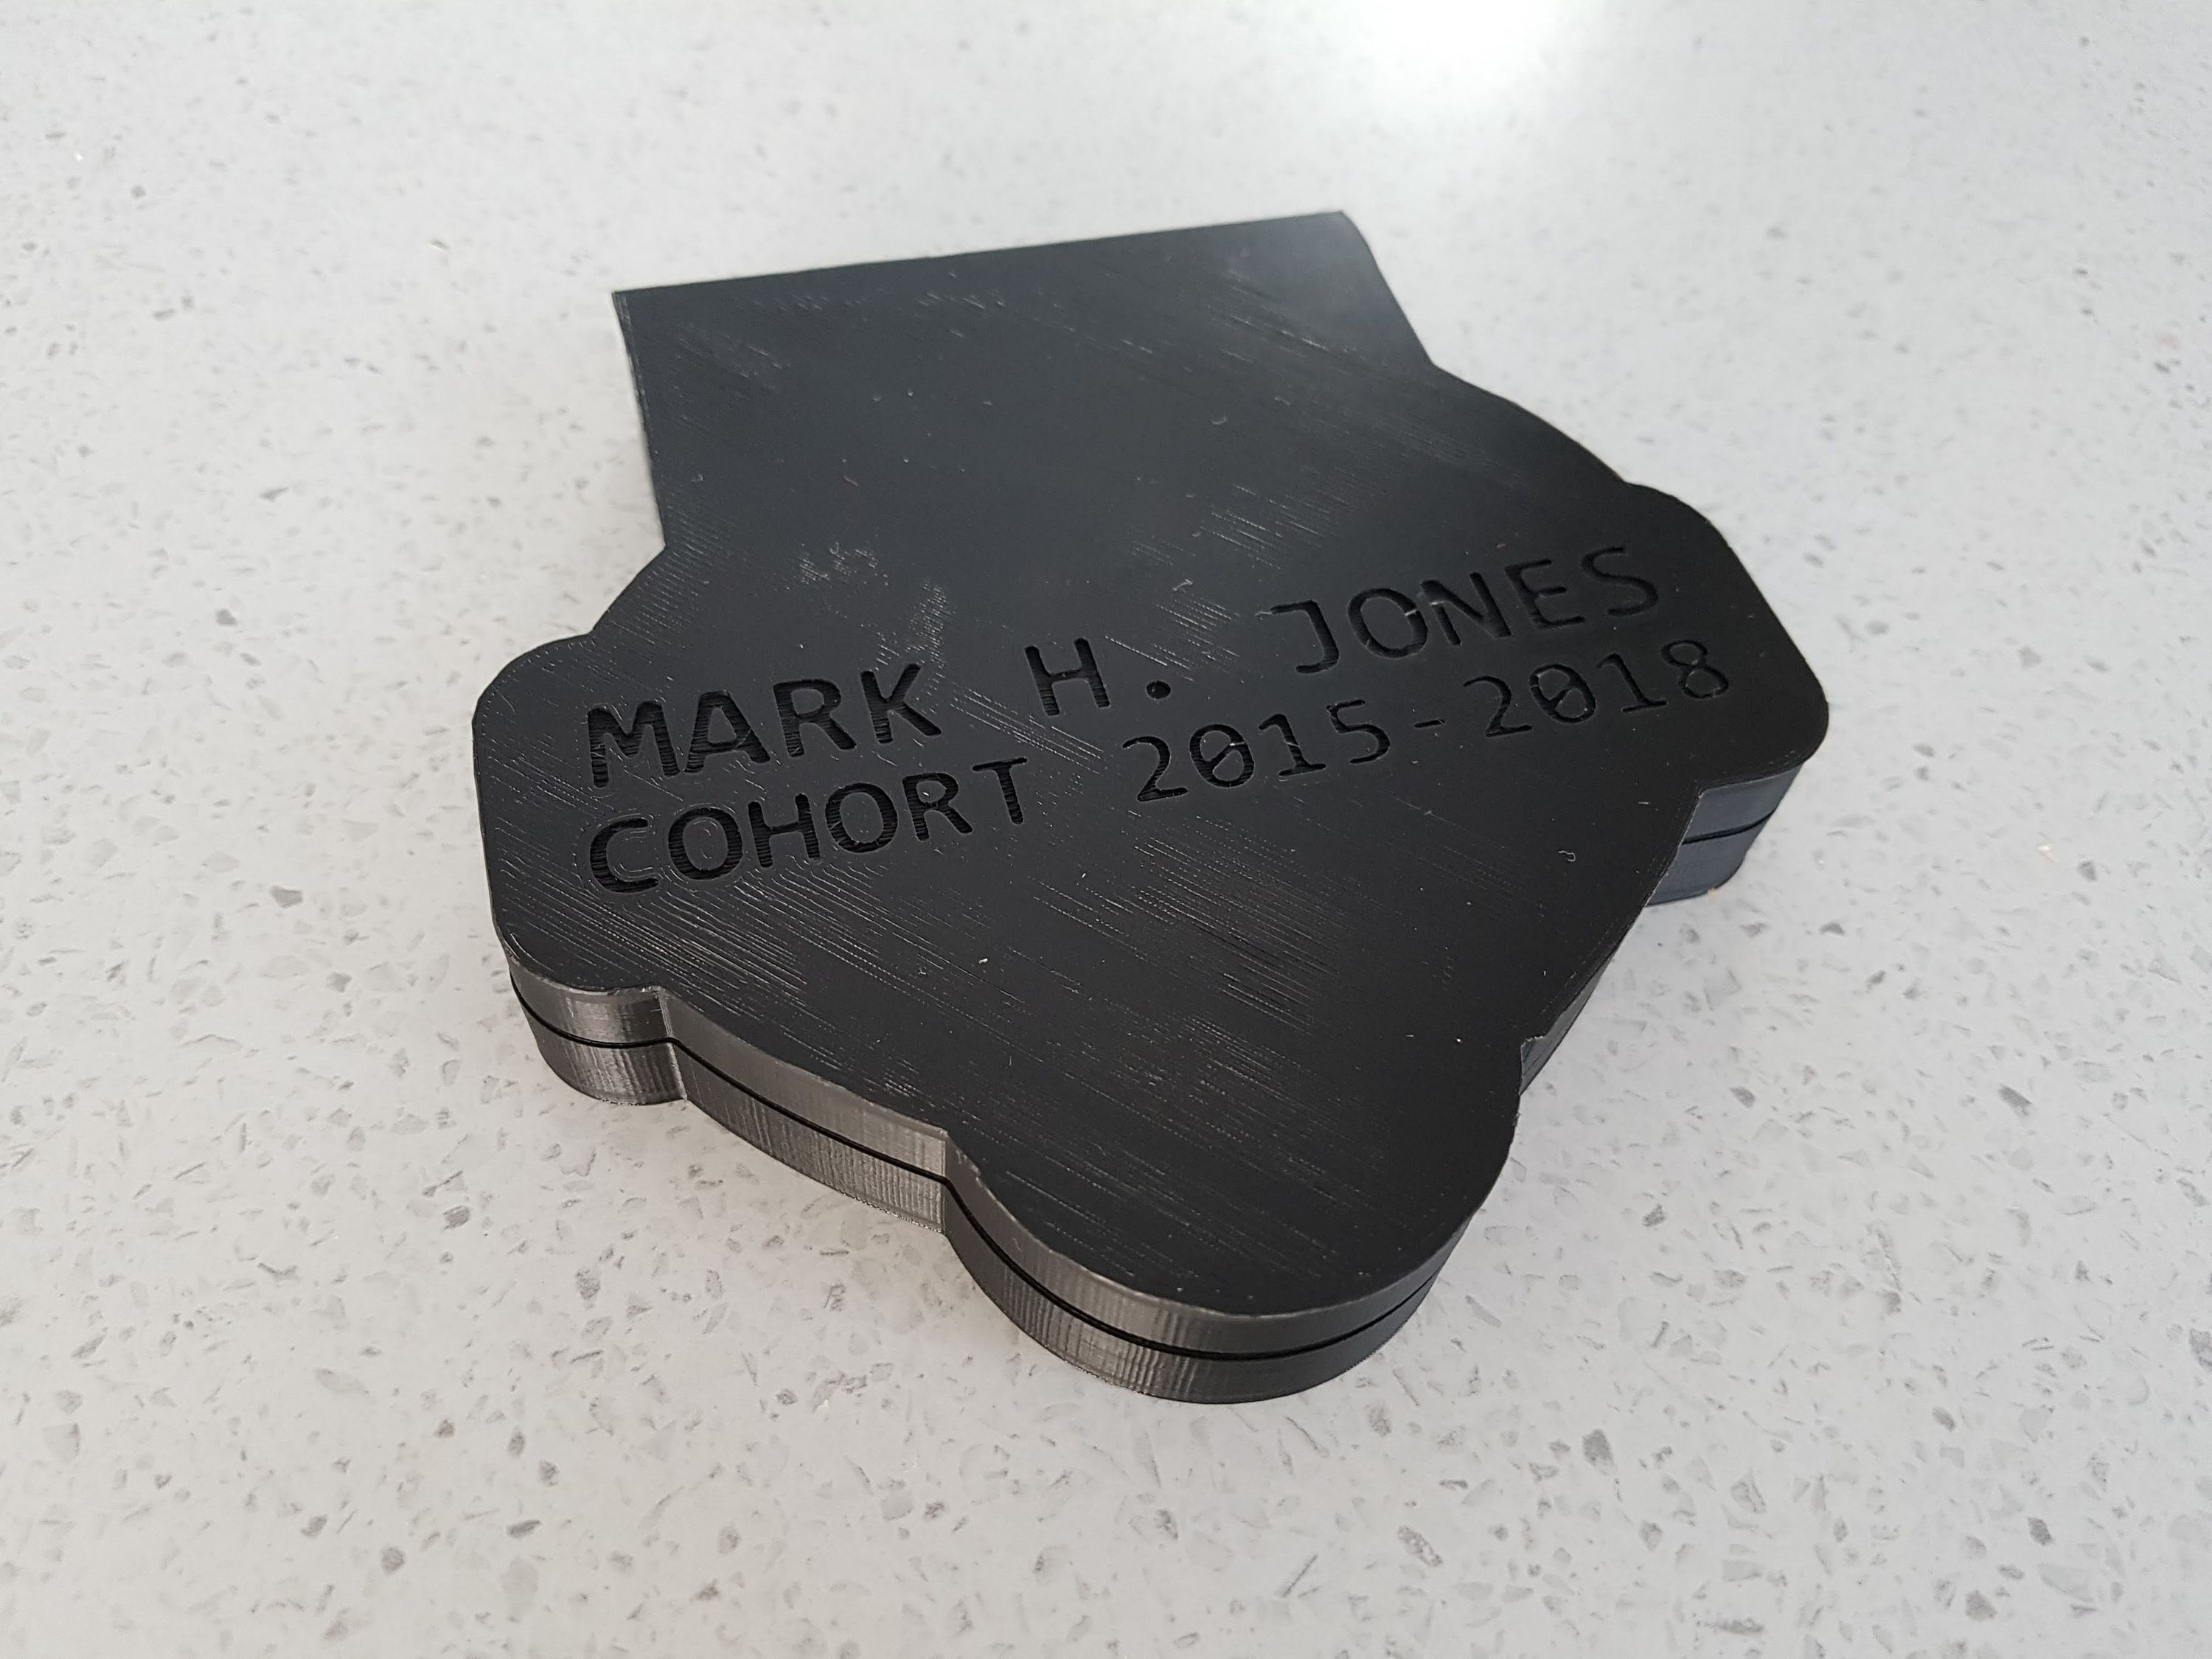
The medal was machined from 3 mm brass sheet. The design features the logo of the company that we were working at along with Mark’s name and the years that we worked together. I did the CAD work designing the medal and two of my coworkers did the CAM and machining using the CNC mill we have at work.
To hold the plate in the mill, we bolted it to a piece of scrap aluminium that we’d faced off. Holes were then drilled and tapped in the auminium and matching holes were drilled by hand in the brass using a paper template. Roughing of the pockets was done with a 6 mm end mill followed by a 2 mm end mill to get into the tight corners. The lettering was quite small and required a 1 mm end mill. The outside profile of the medal was machined last using a 2 mm end mill and leaving webs so that the part wasn’t fully cut from the stock. The webs were then cut by hand with a hack saw. The machining went really well and the part looked impressive when it came out of the machine.
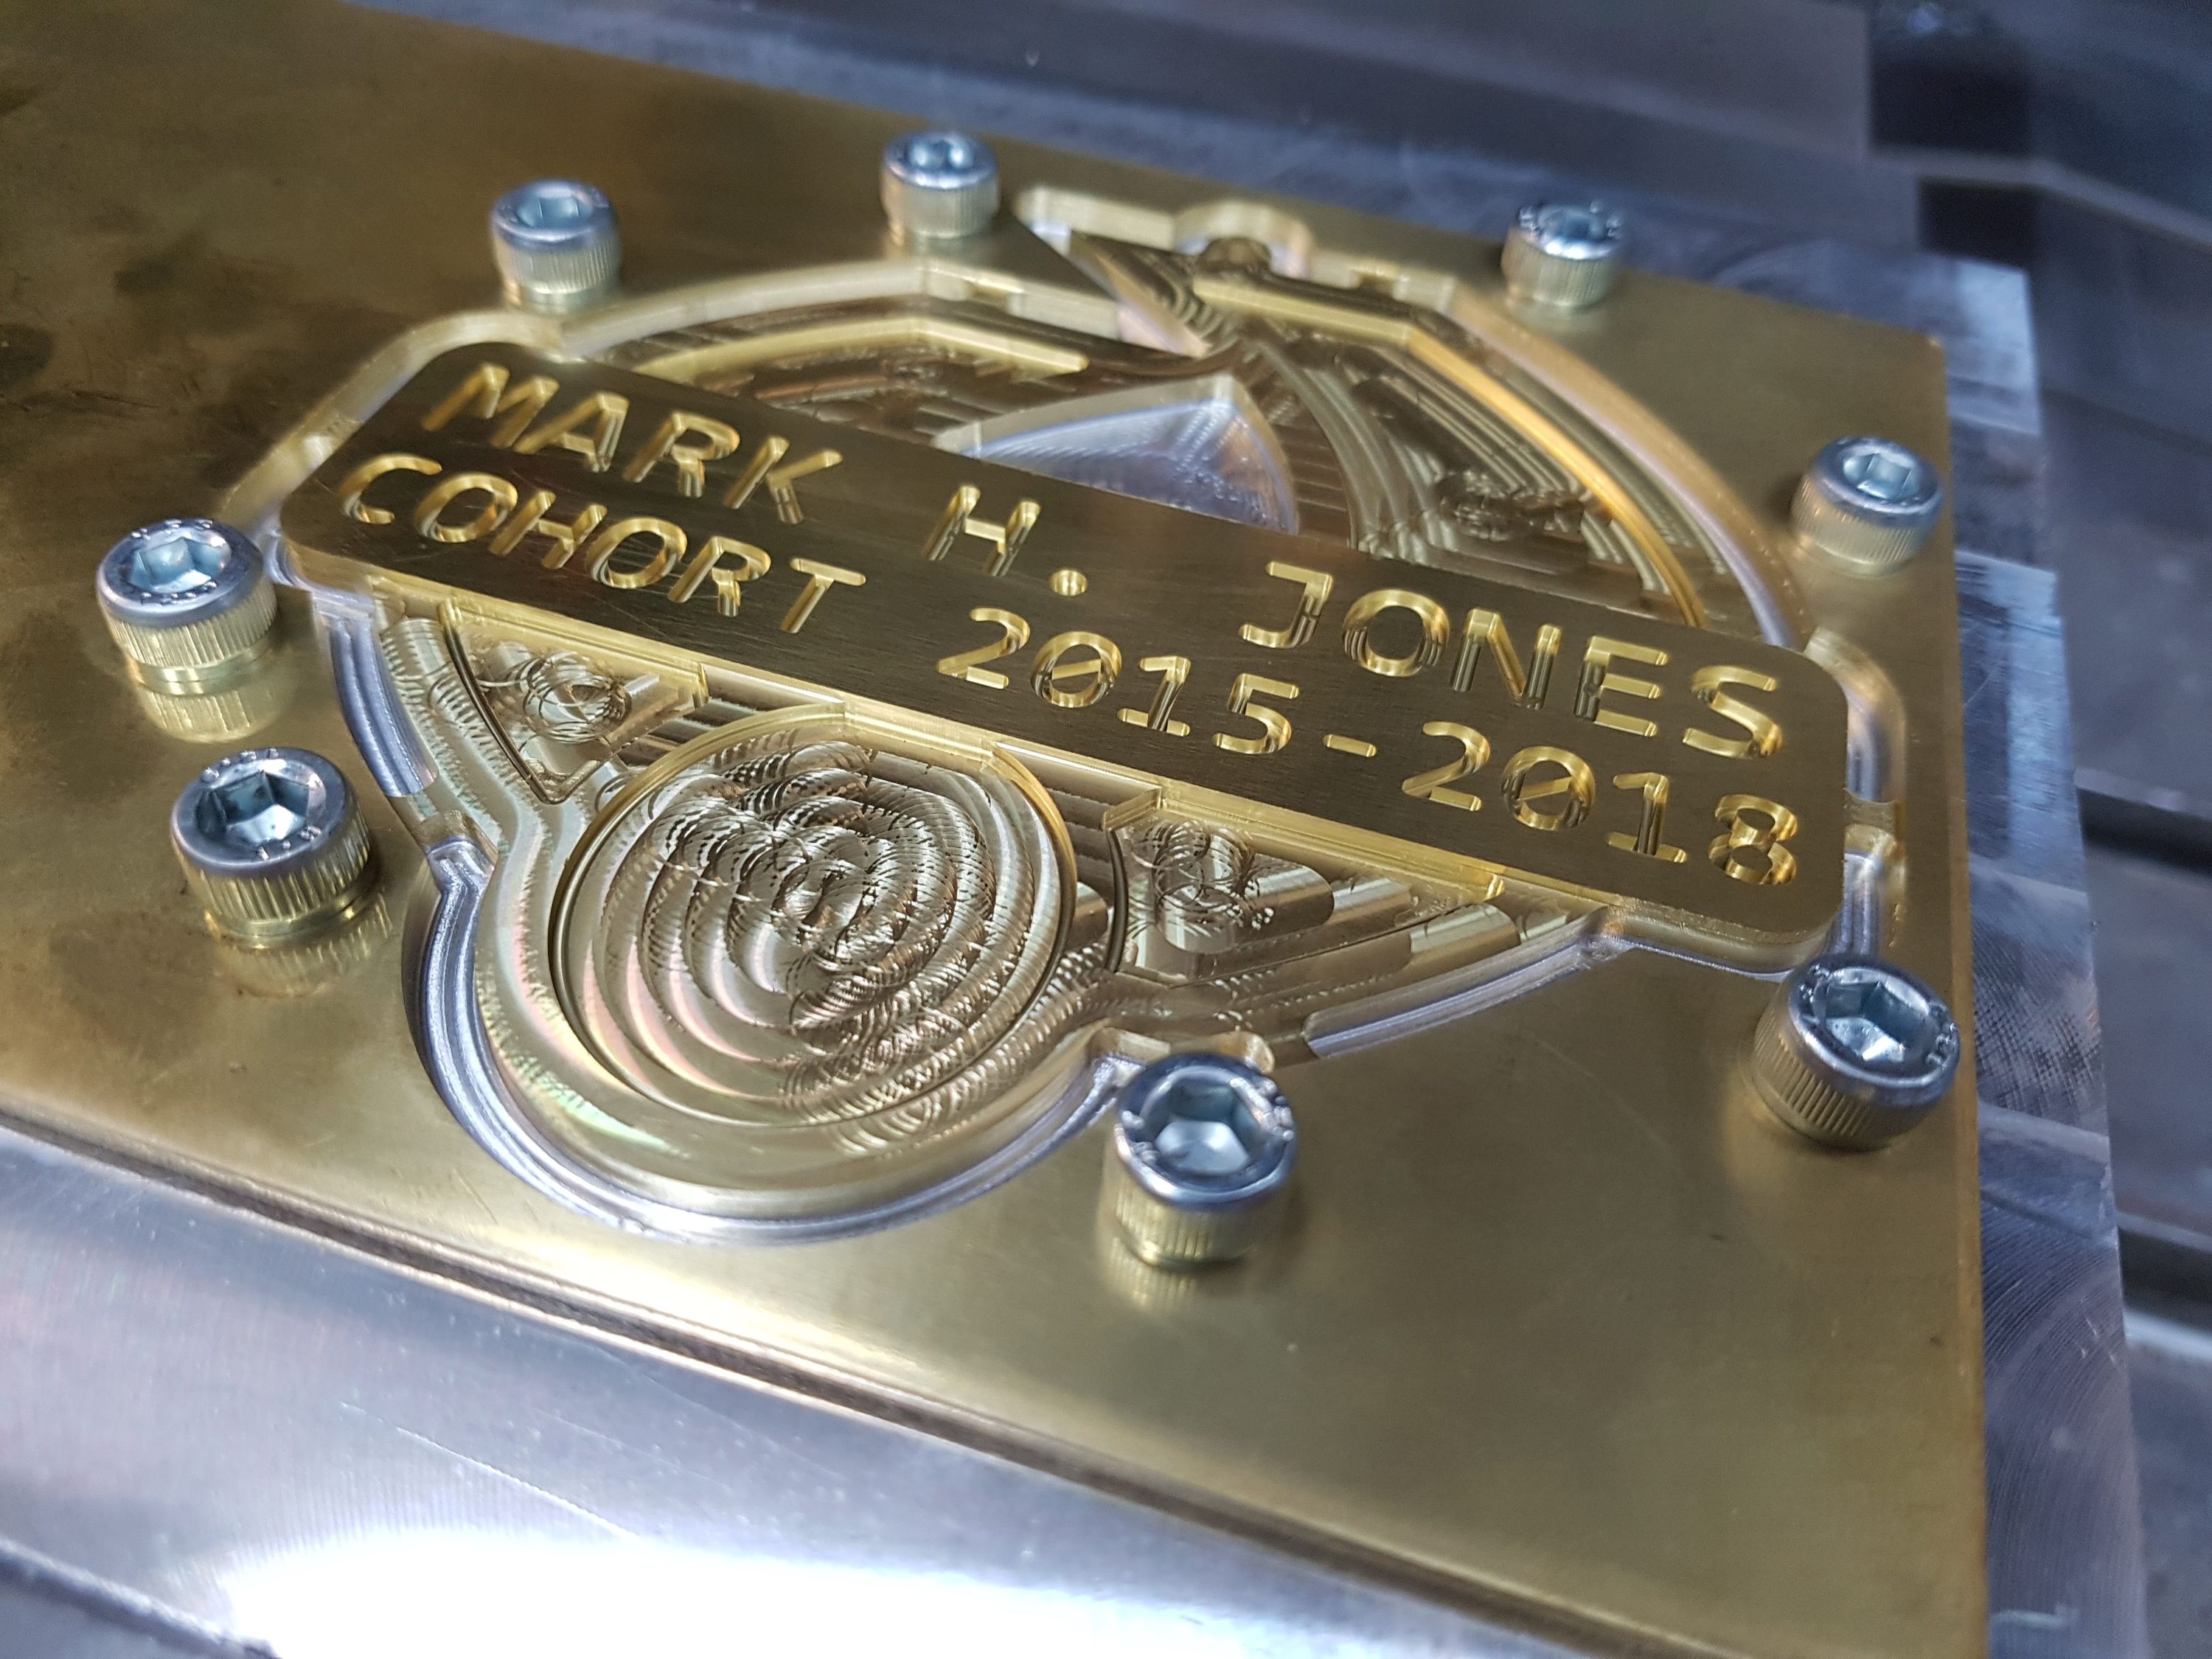 The medal once machining was finished. It’s held to the stock by the 6 webs that are just visible.
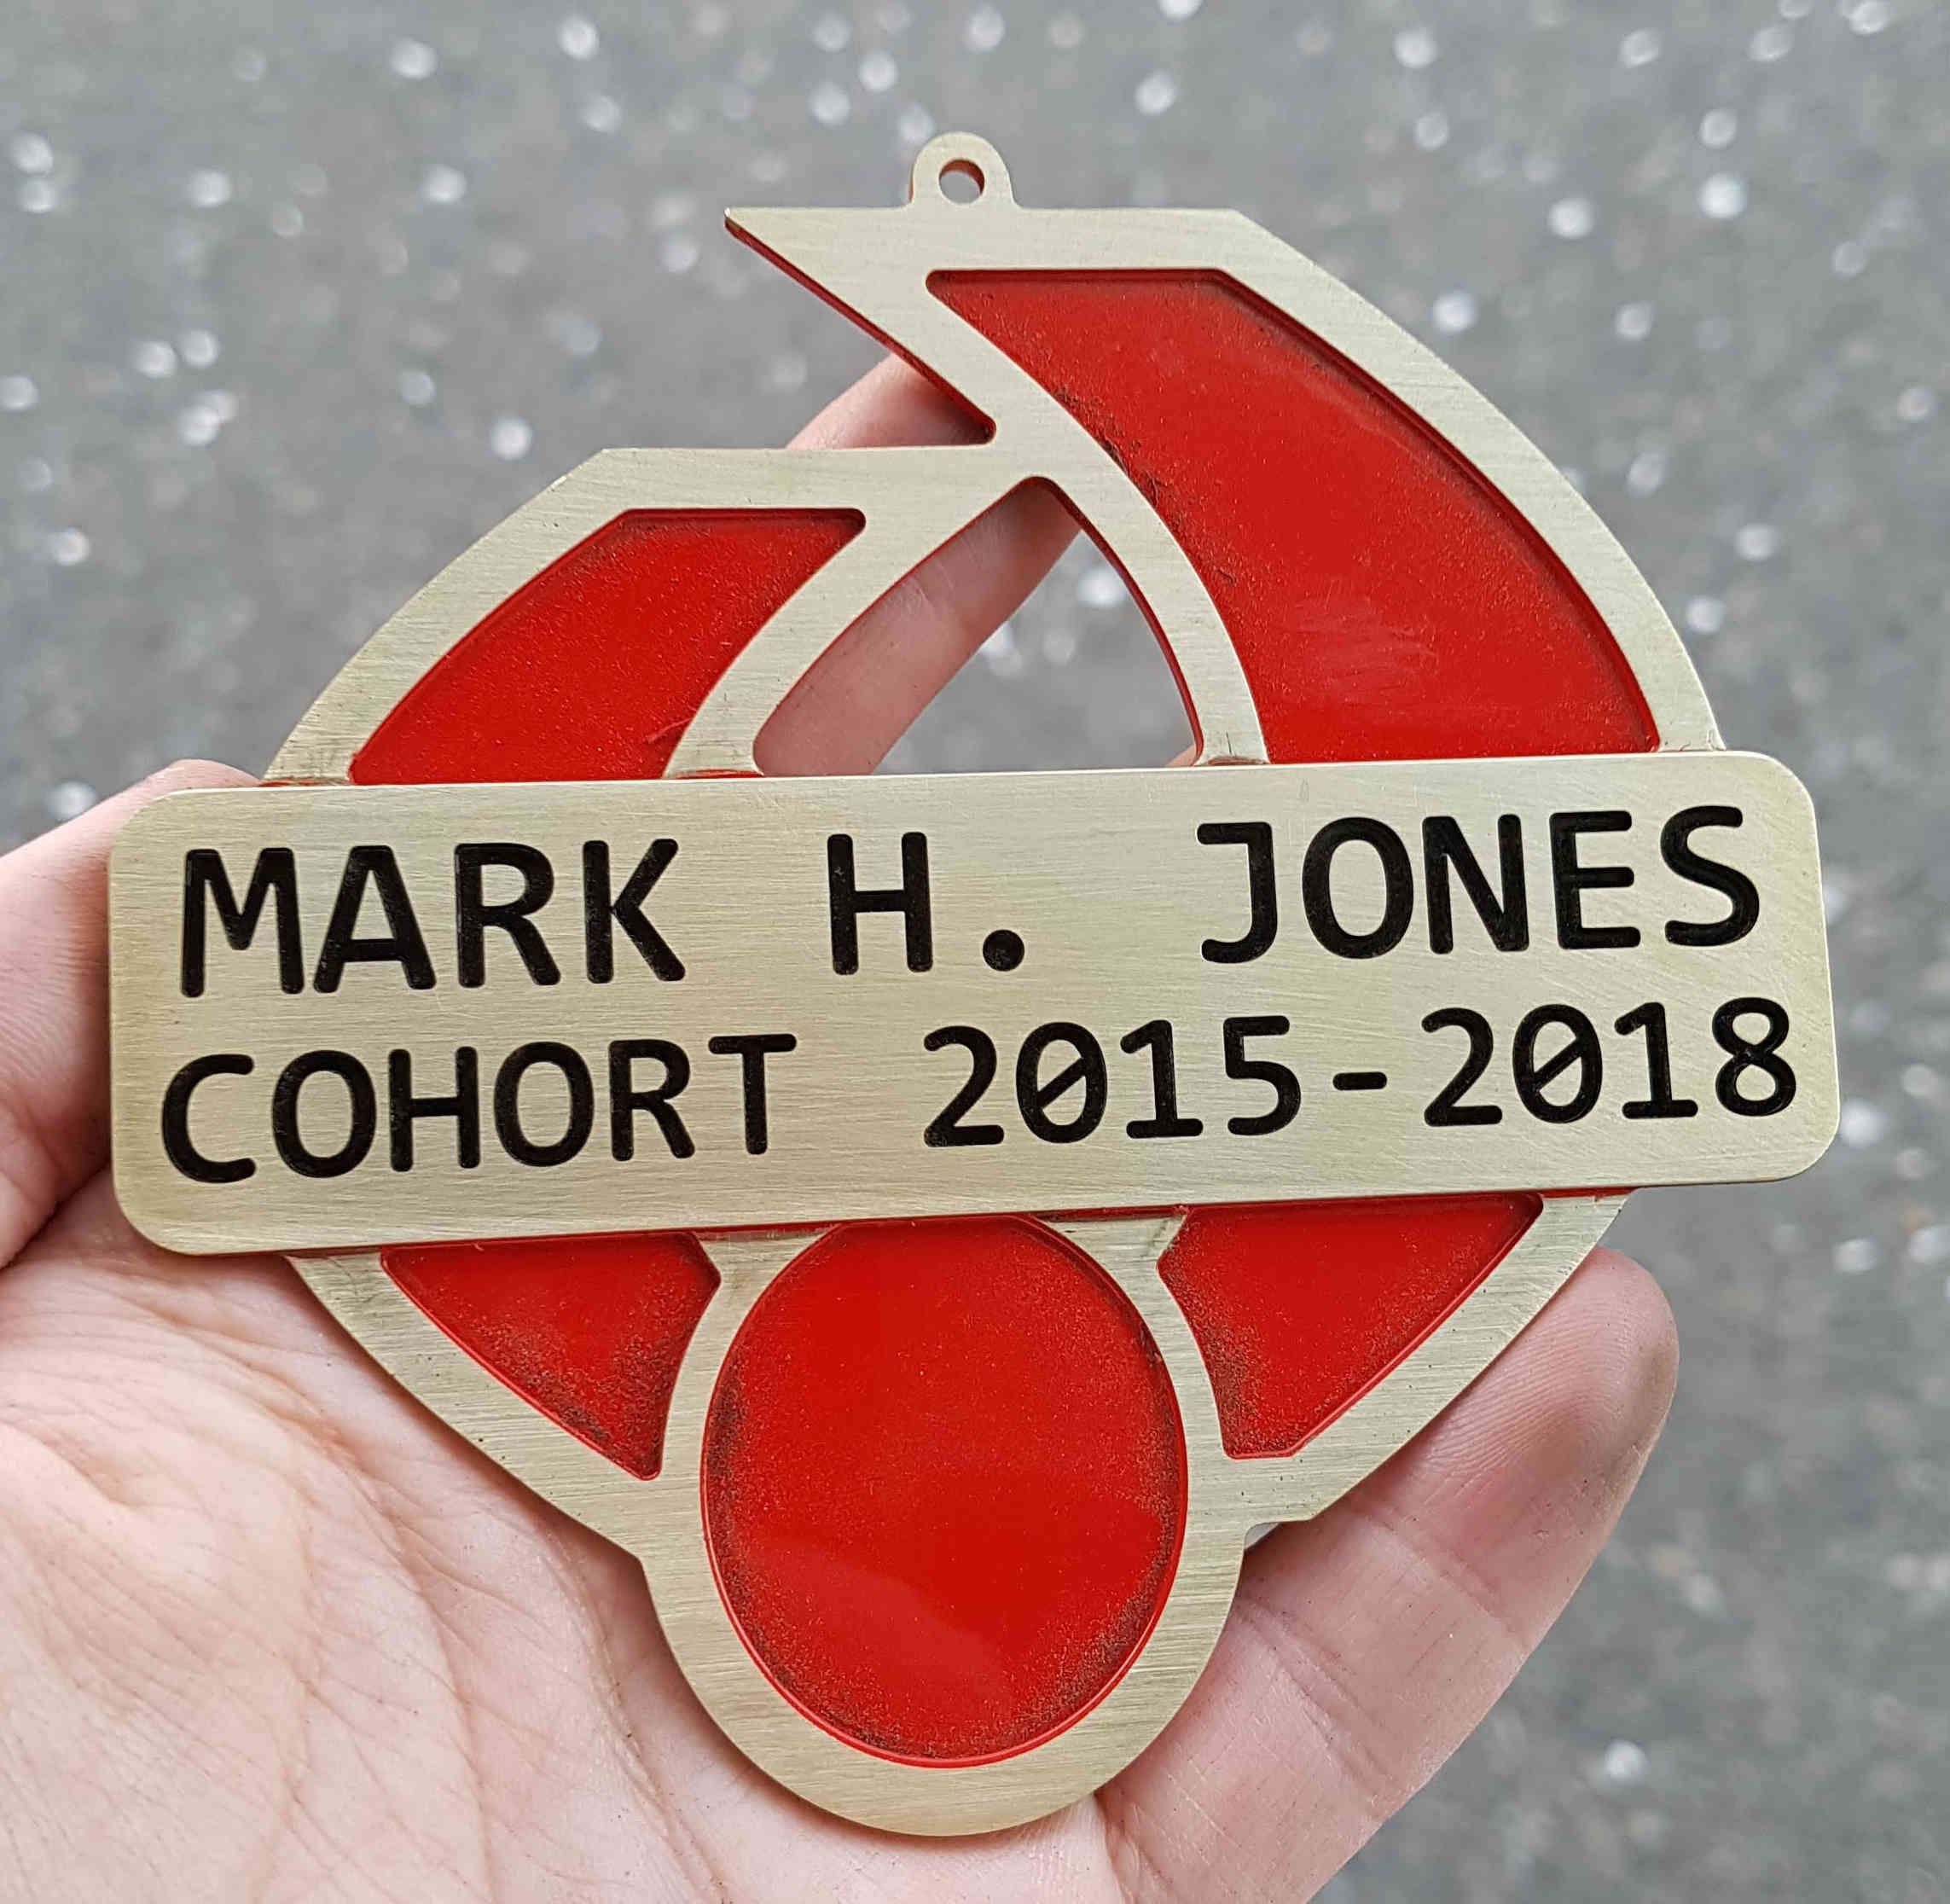
I then filed and sanded the nubs left from the webs and sanded the whole part to prepare it for painting. I masked over the top of the lettering and sprayed on a few coats of gloss red. After that had dried, I masked off the red parts and painted the letting gloss black. I designed the medal so that the parts I wanted painted were all lower than the top surface of the medal. That way I could just sand the top surfaces to get a clean edge to the paint without complicated masking. It worked out really well.
 The medal after sanding off most of the excess paint. The ugly bits visible on the red parts is just sanding dust.
To finish the medal, I sanded all the brass, moving up in grit to 1500. I then polished it with Autosol metal polish. This made it look really nice and shiney but the polishing paste ended up going down into the lettering. I didn’t think that would be a problem at first but after trying for a few hours to clean it all out, I realised my mistake. I never got all of the polish out and it impacts the final look of the part.
I also made a case for the medal so that Mark has something to keep it in. It’s a pretty simple 3D printed clamshell design with magnets embedded to keep it closed. I put in a shelf that I lined with silky red fabric so that the ribbon for could sit underneath. The outer profile of the case matches the profile of the medal. The hinge was a piece of stainless steel welding wire. Overall, the case came out really nice. The magnets are spaced really well so it is easy enough to open but stays closed when you need it to. The hinge is nice and smooth with very little friction but no wobble.
 The 3D printed case.
The tresure hunt was the first that I have done where I could incorporate technical challenges. My previous tresure hunts have always had a non-technical audience, so I’ve had to keep the puzzles general enough that anyone could solve them.
Mark’s tresure hunt started with me giving him a note saying that I had got him a gift. It then had a string of ‘random’ letters and numbers. Mark pretty quickly worked out that it was ASCII encoded as hexadecimal. The decoded message was a URL to a page on my website. The page contained a single SVG image. The source of an SVG is somewhat human readable as it is XML formatted. I used this to embed the contents of an STL file as a comment in the XML. Mark took a few minutes to work out the correct file type, but he was soon looking at a solid model in Blender.
The model had text saying “export ROS_MASTER_URI=http://192.168.1.51:11311”. Running this command in a terminal allowed him to connect to the ROS core that was running on my PC. From there he quickly found a topic called “clue” and discovered that the messages were point clouds. He viewed the clouds in RViz and found that the points formed letters that said, “CHECK THE TIDE CHART AND PUT YOUR BOOTS ON”.
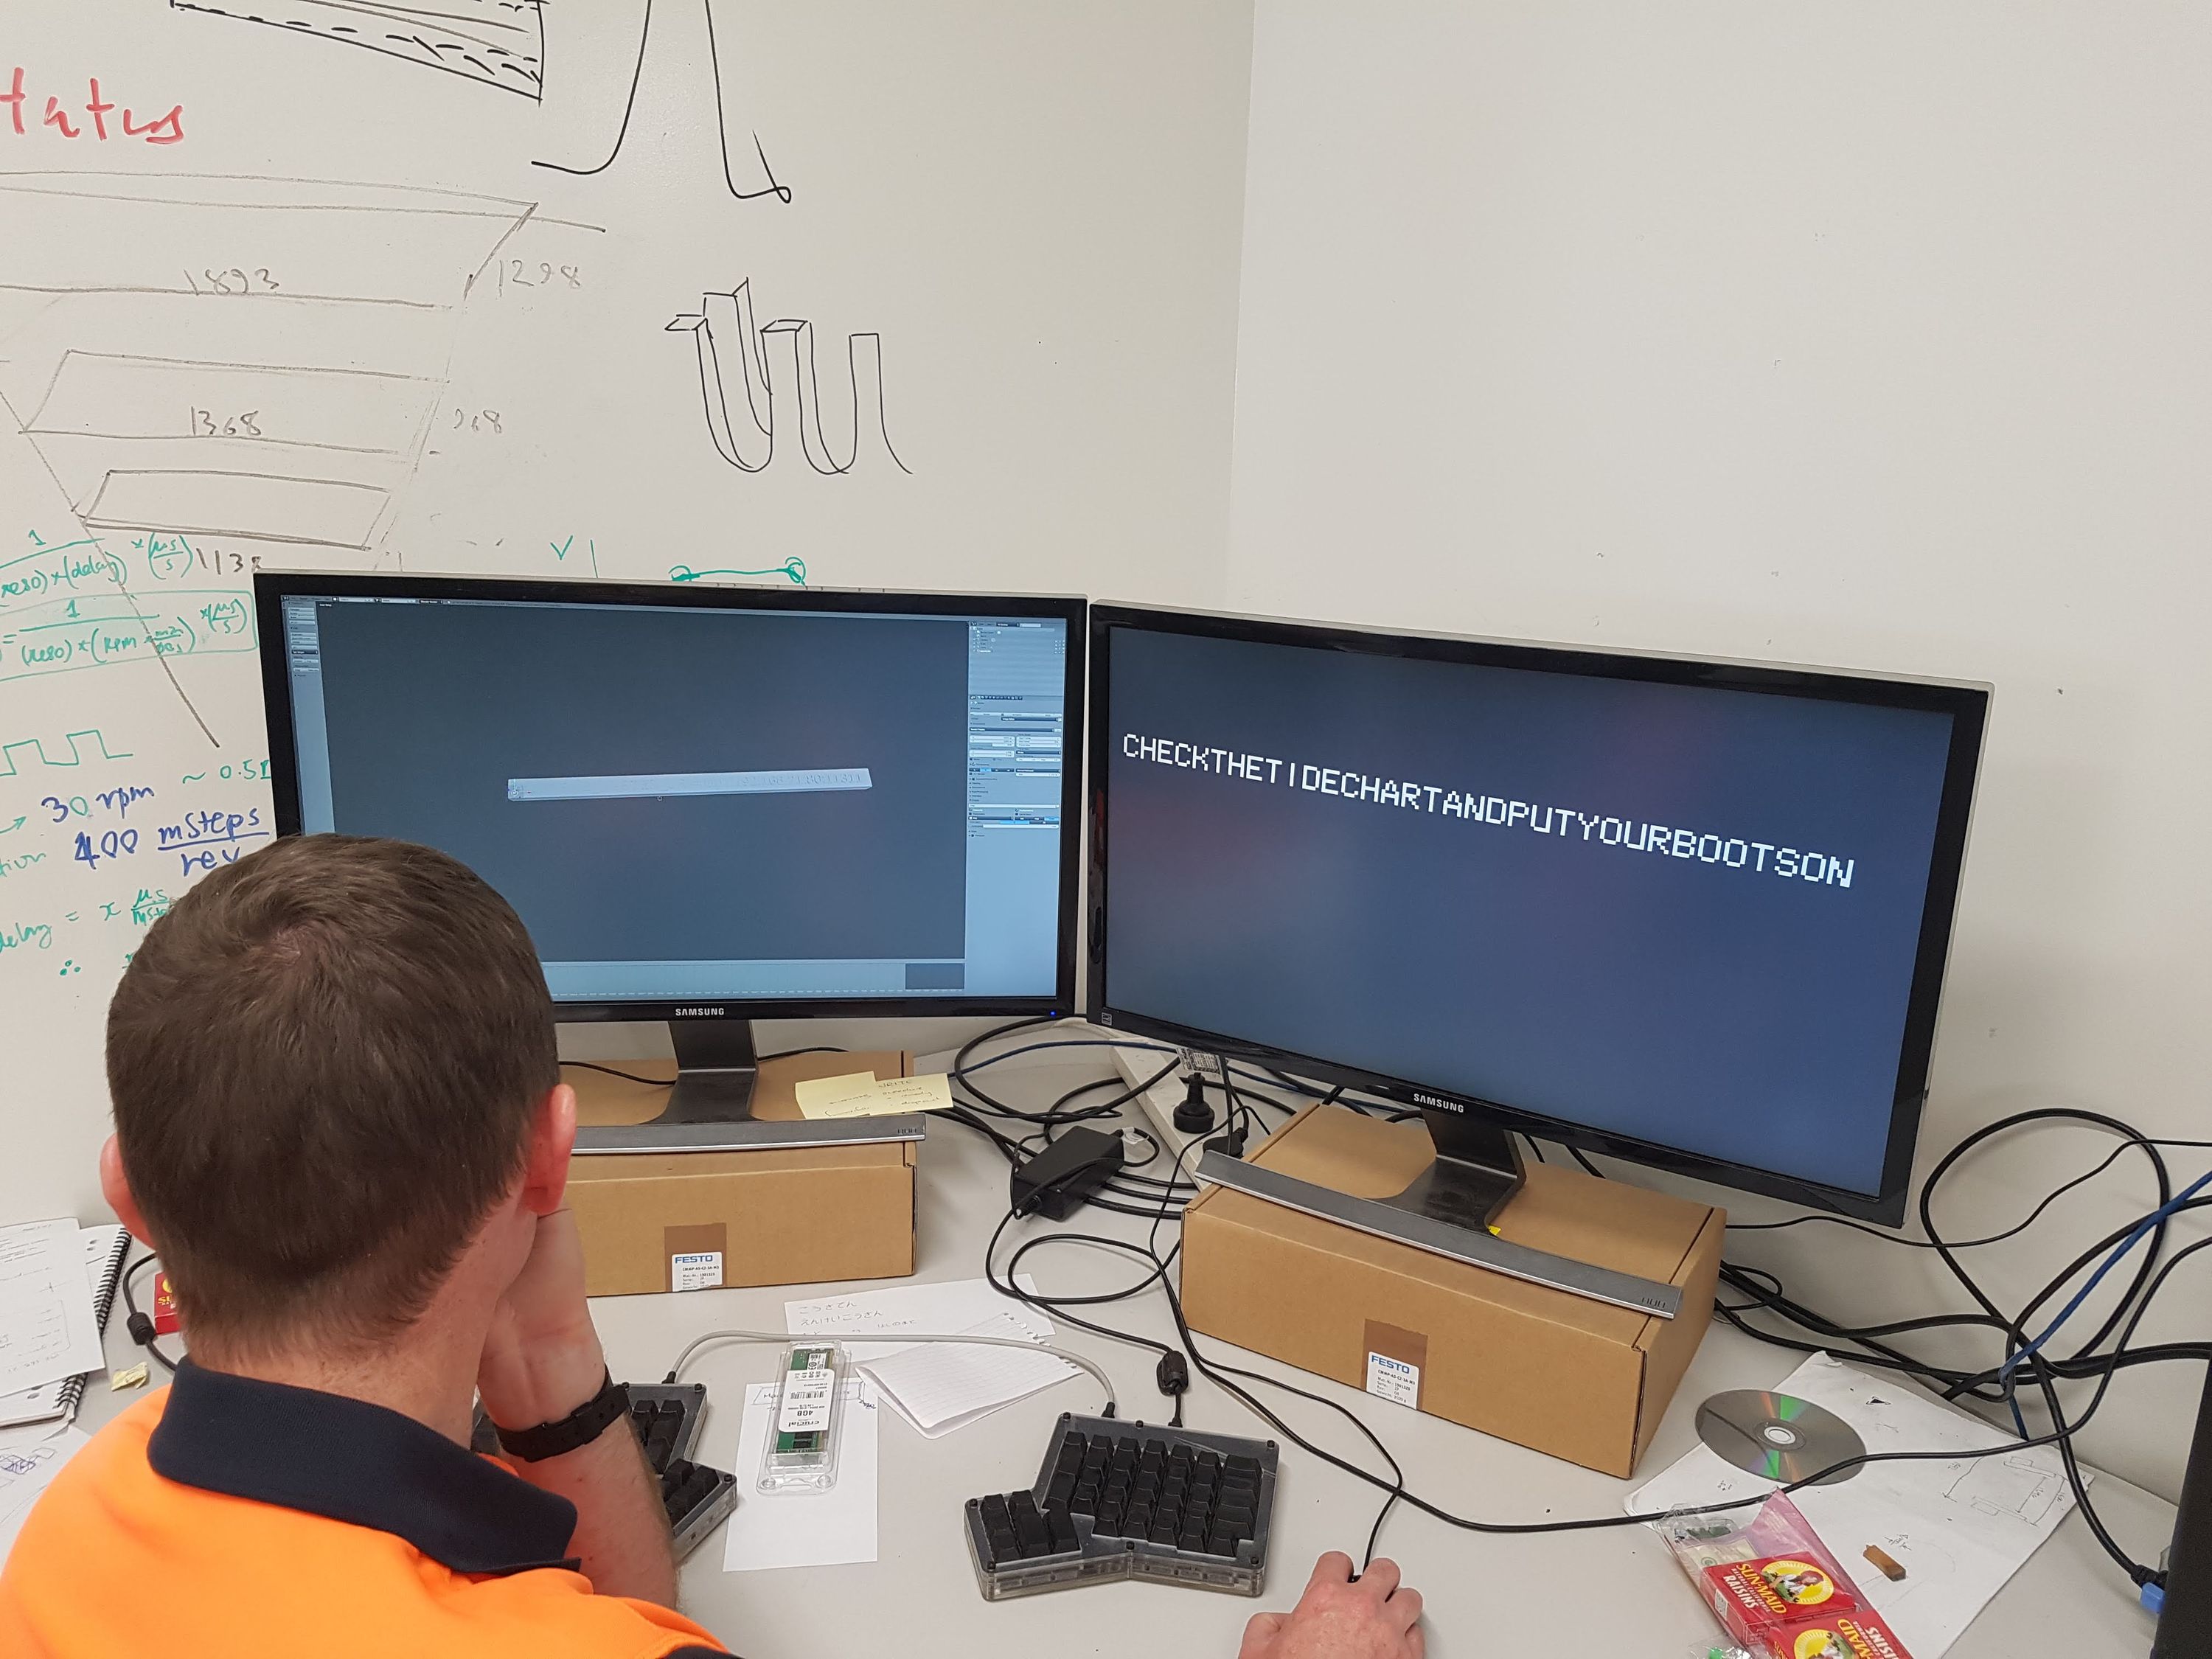 Mark solving puzzles. On the left screen is Blender showing the STL. The text on the model isn’t really visible in this picture. On the right screen is RViz displaying the point cloud.
The office we worked in is about 20 minutes walk from a bit of a lookout where you can see over a harbour. We did that walk most days at lunch time in order to get a bit of sun and fresh air and to admire the view. There is a very small island a few hundred meters from the shore. At low tide, it’s possible to walk out to this island. So I hid a clue there. Mark’s first instinct in reading the tide chart clue was that he had to go out to the island. But for some reason he didn’t believe it. He searched around the office and racked his brain for about 45 minutes before finally giving in to his first instinct. Once we got to the island, he was pretty quick to find a container I had stashed there. It contained a piece of paper with some Japaneese writing on it (Mark had been learning Japaneese as he was moving to Japan). The message translated to, “In the heart of your child”. He immediatly knew this refered to the vehical that he had designed and developed over the past few years. The medal was hidden inside it.
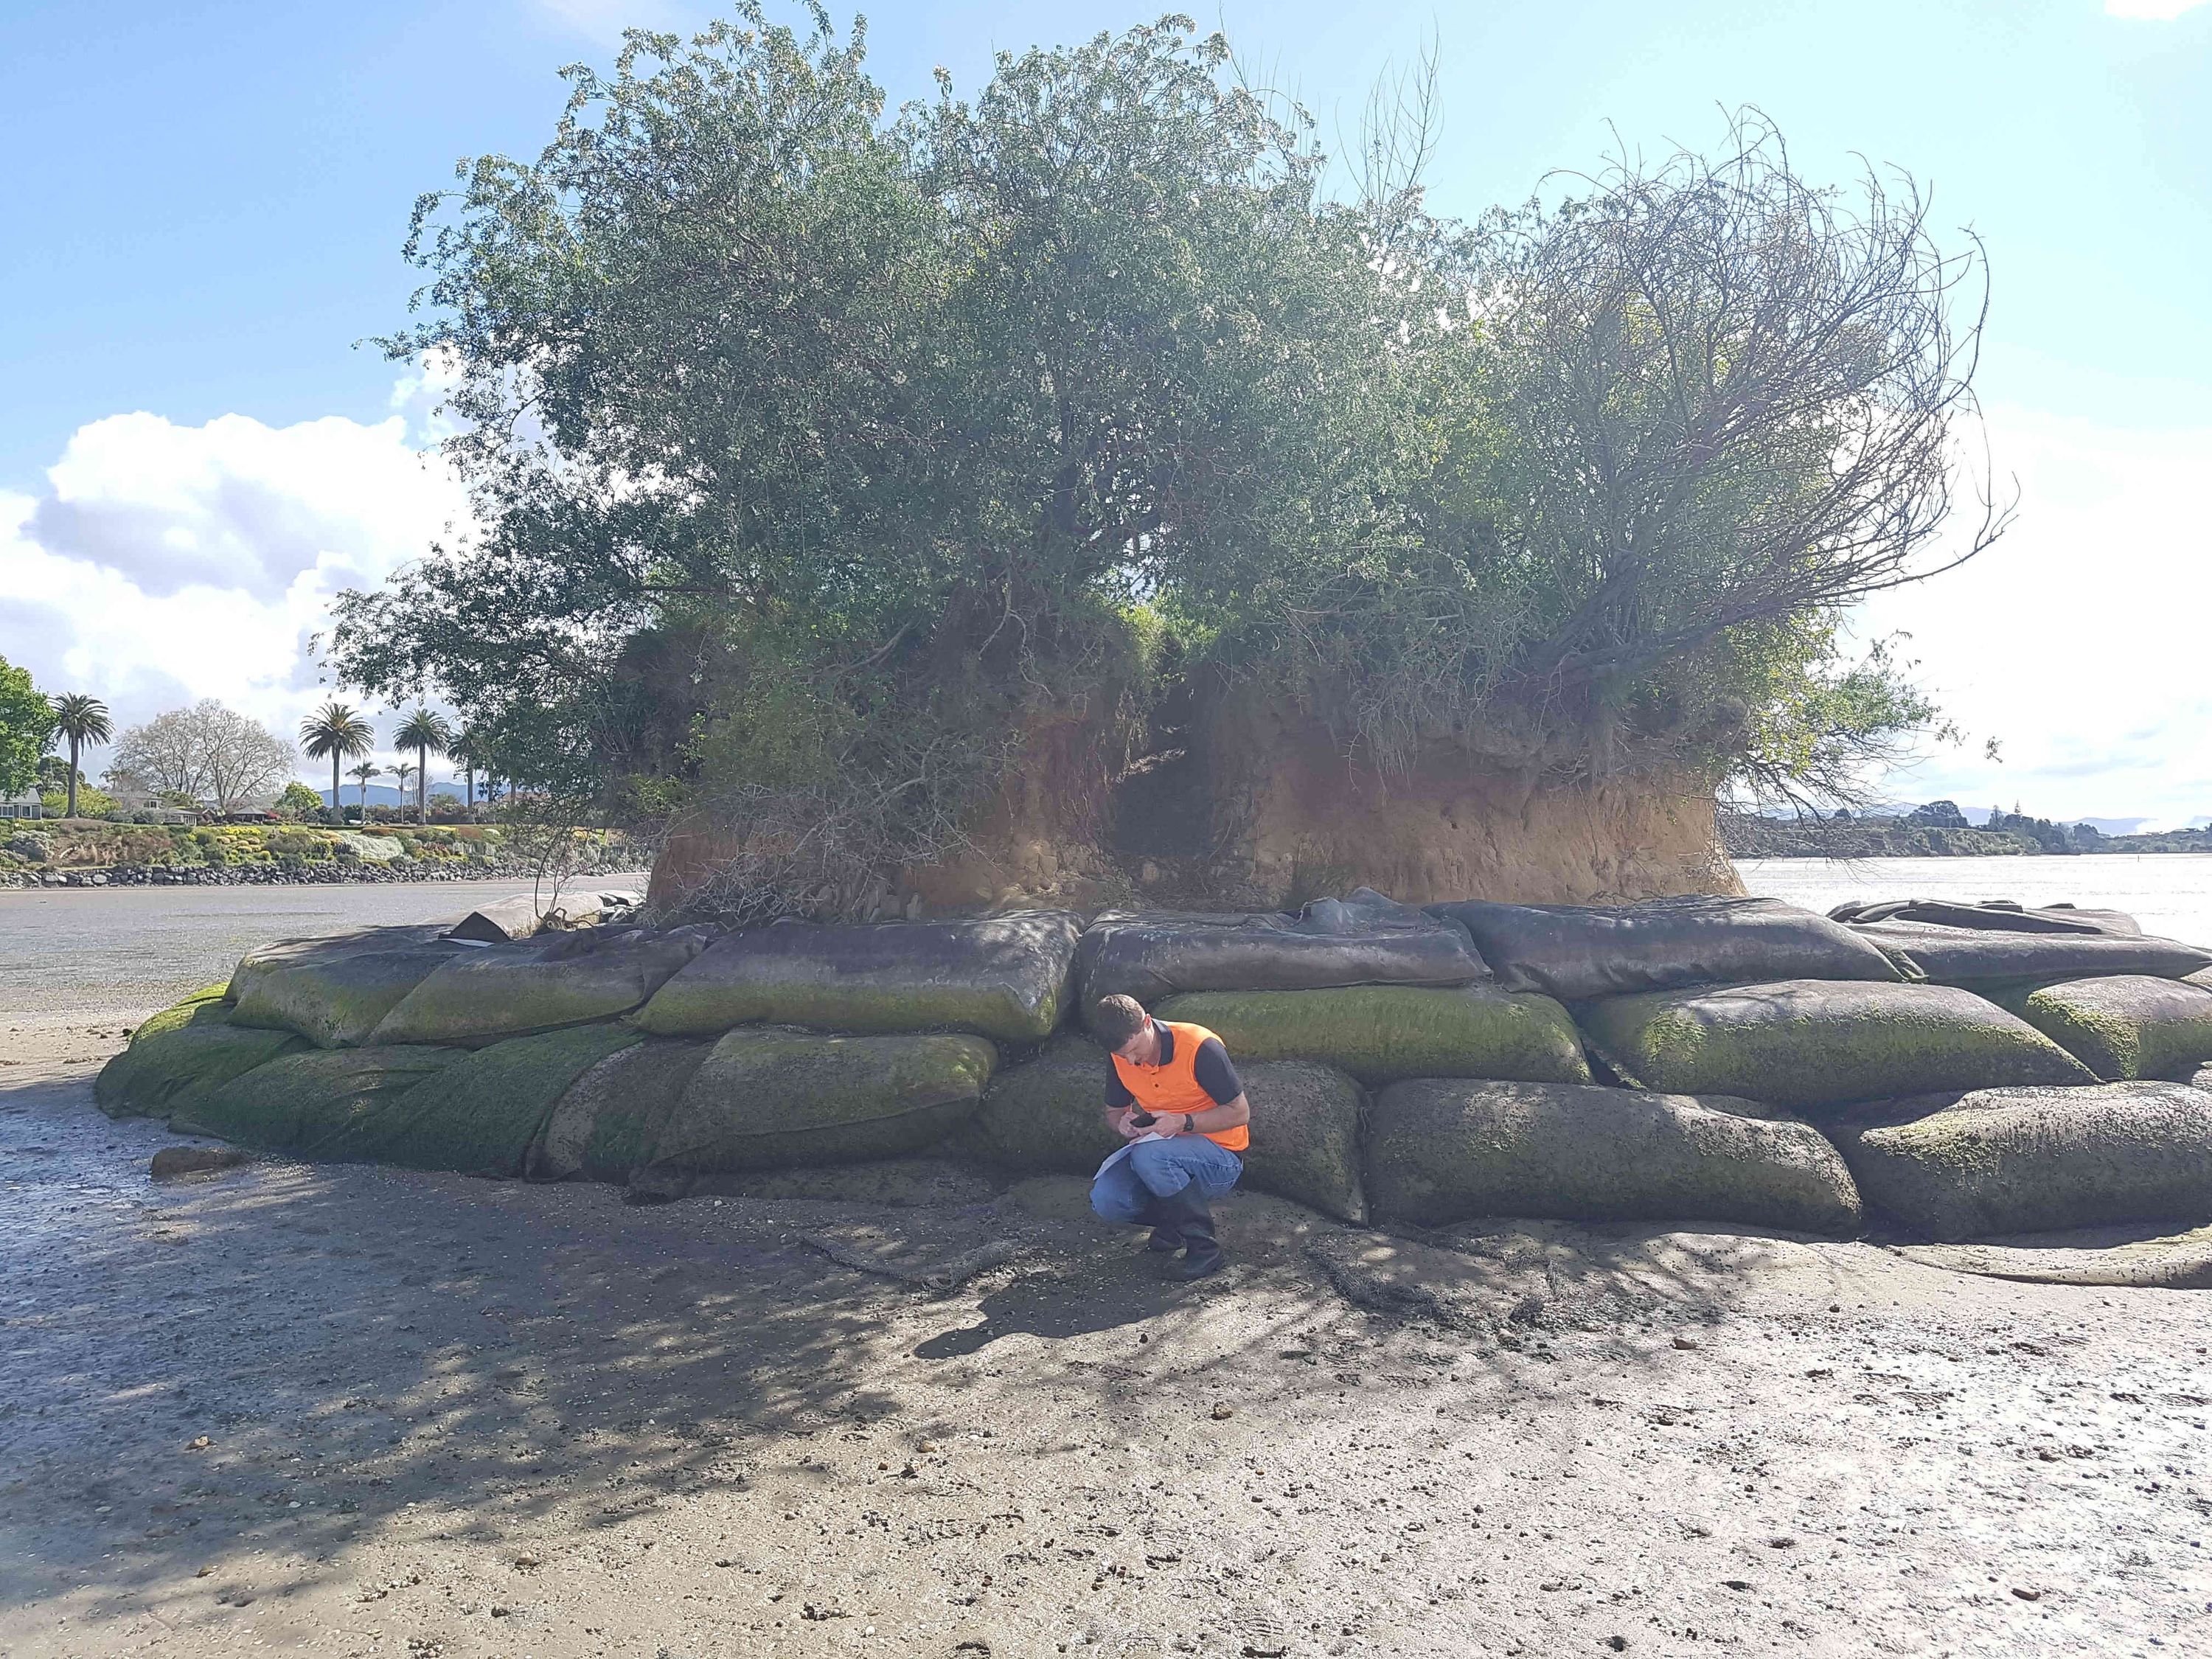 Mark beside the island, cheating with Google Translate.
It took Mark about an hour and a half to work through the puzzels. The bulk of that time he spent not believing that I had hidden a clue on the island. It was a blast watching him work through it all and the massive grin on his face when he opened the medal was priceless.
This was a really cool project where I both learned a lot and Mark seemed to have a good time and apreciate it. It was a bit of a rush to get it all finished in time as I had a couple of the 3D prints fail but it all worked out in the end. I’m really glad I did it as it’s something I (and hopefully Mark) will remember for a long time.